
Last Updated on June 26, 2023 by Sharon Advik
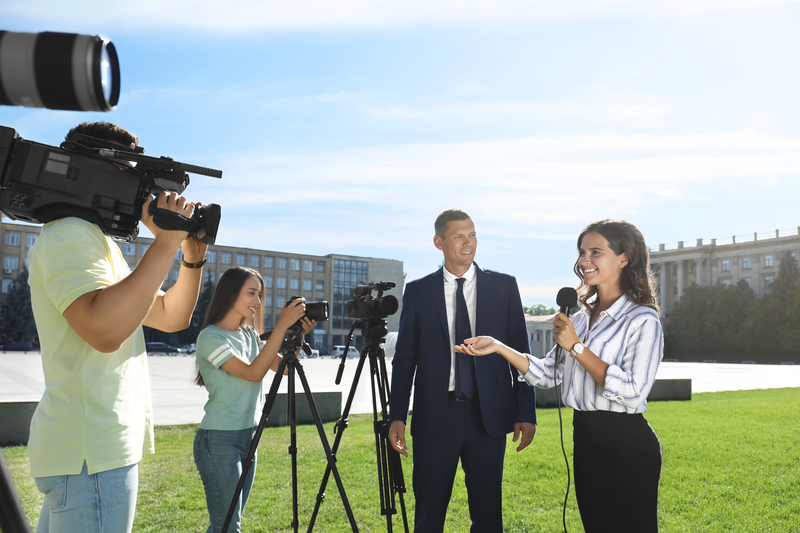
Filmmaking (film production) is the action by which a motion picture is created.
Filmmaking happens in various economic, social, and political contexts worldwide.
It includes a variety of advanced technologies and cinematic methods.
Along with these concepts, the best camera is essential for producing a good film.
Choosing a perfect camera for this purpose must be a tricky job.
There are some best cameras for budget filmmaking that are discussed below.
Have a look:
Which are the best cameras for budget filmmaking?
Here are my recommended top 12 best cameras for budget filmmaking:-
| Image | Best camera for | View on Amazon |
|---|---|---|
 | Fujifilm X-T3: (best camera for low budget filmmaking) | View on Amazon |
 | Fujifilm X-T4: (best affordable 4k camera for filmmaking) | View on Amazon |
 | Canon 90D: (best budget DSLR for filmmaking) | View on Amazon |
 | Canon EOS M50: (best video camera for low budget filmmaking) | View on Amazon |
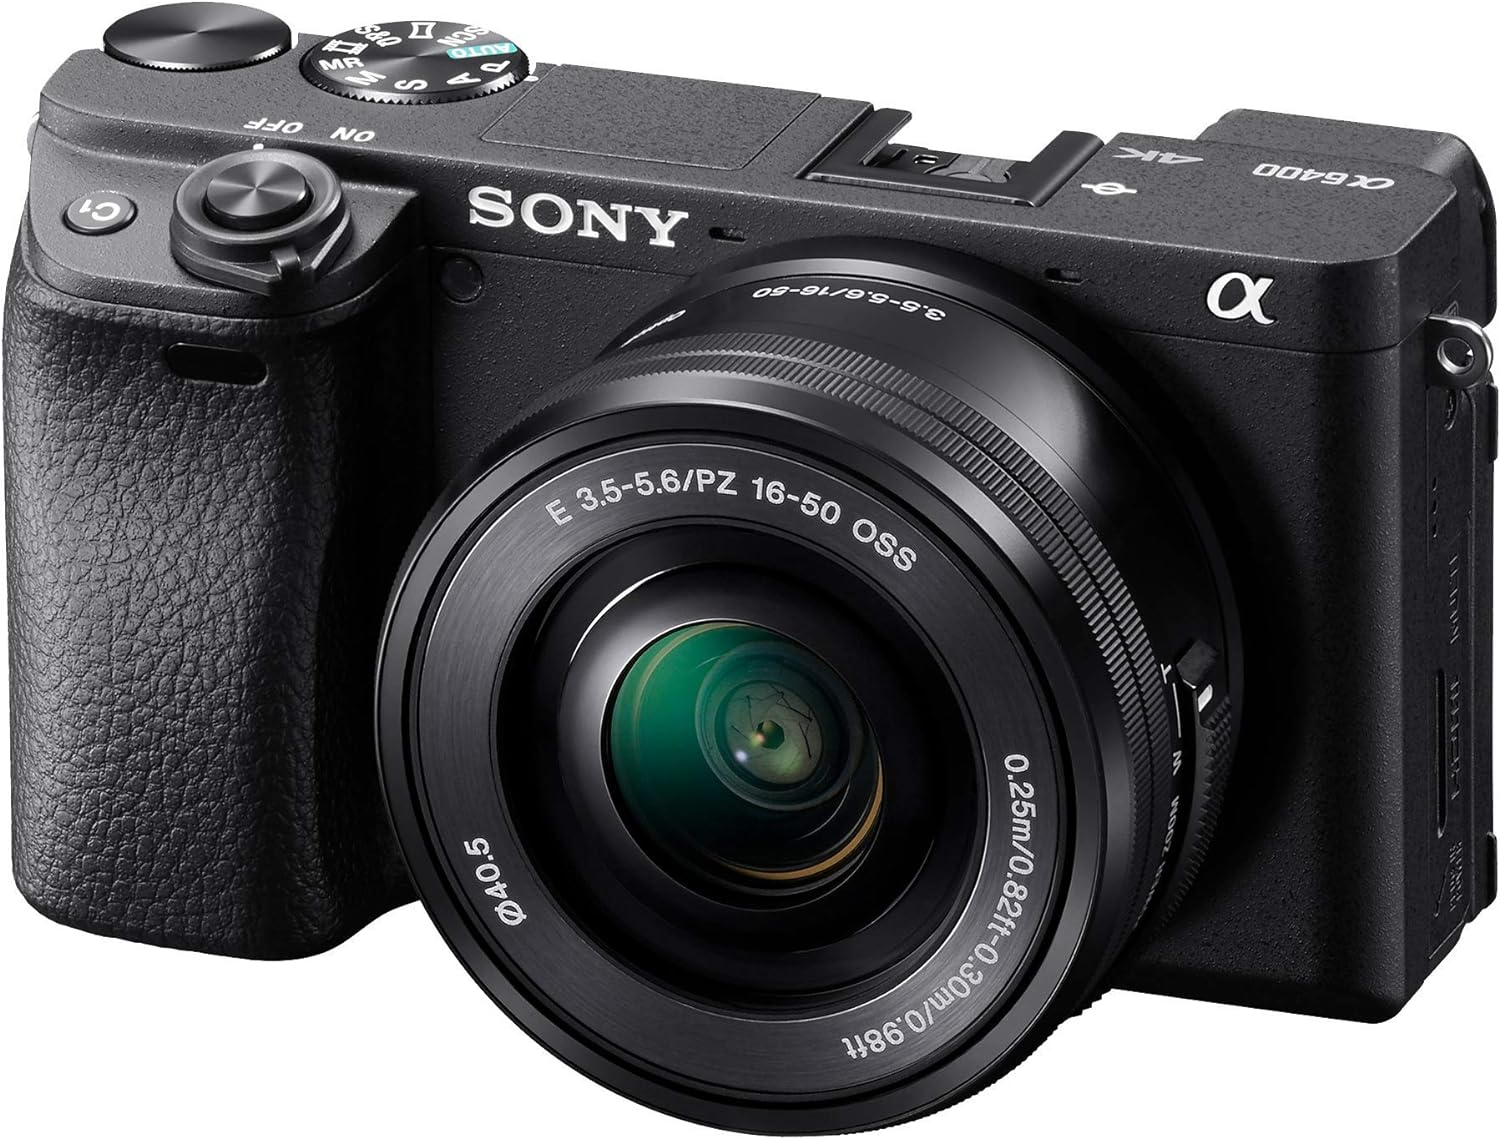
 | Sony A6400: (best budget Sony camera for filmmaking) | View on Amazon |
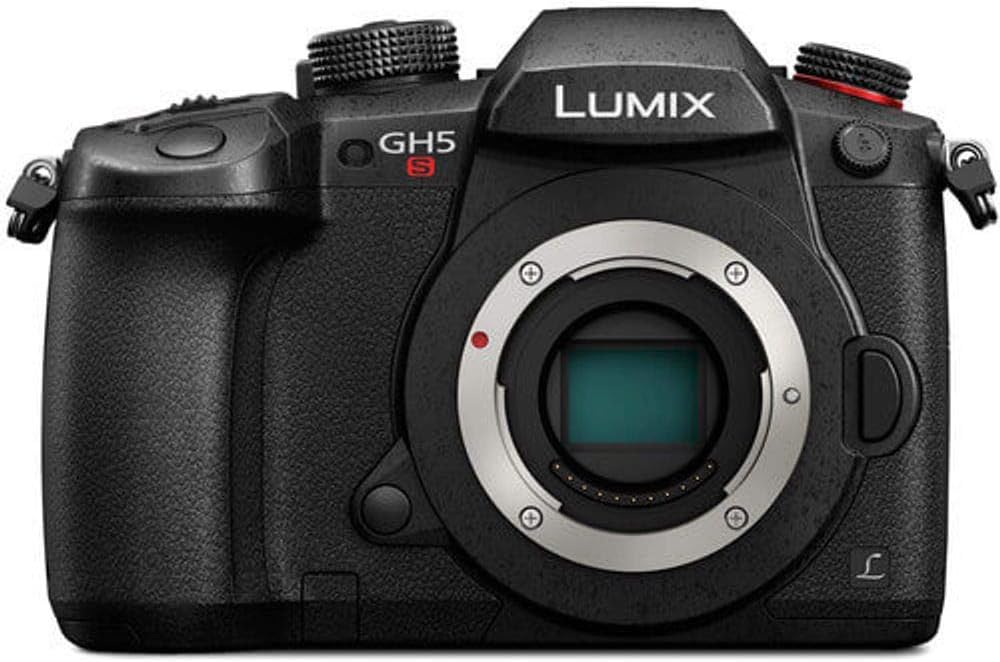
 | Panasonic GH5s: (best budget camera for documentary filmmaking) | View on Amazon |
 | Canon 5D Mark III: (best canon camera for filmmaking on a budget) | View on Amazon |
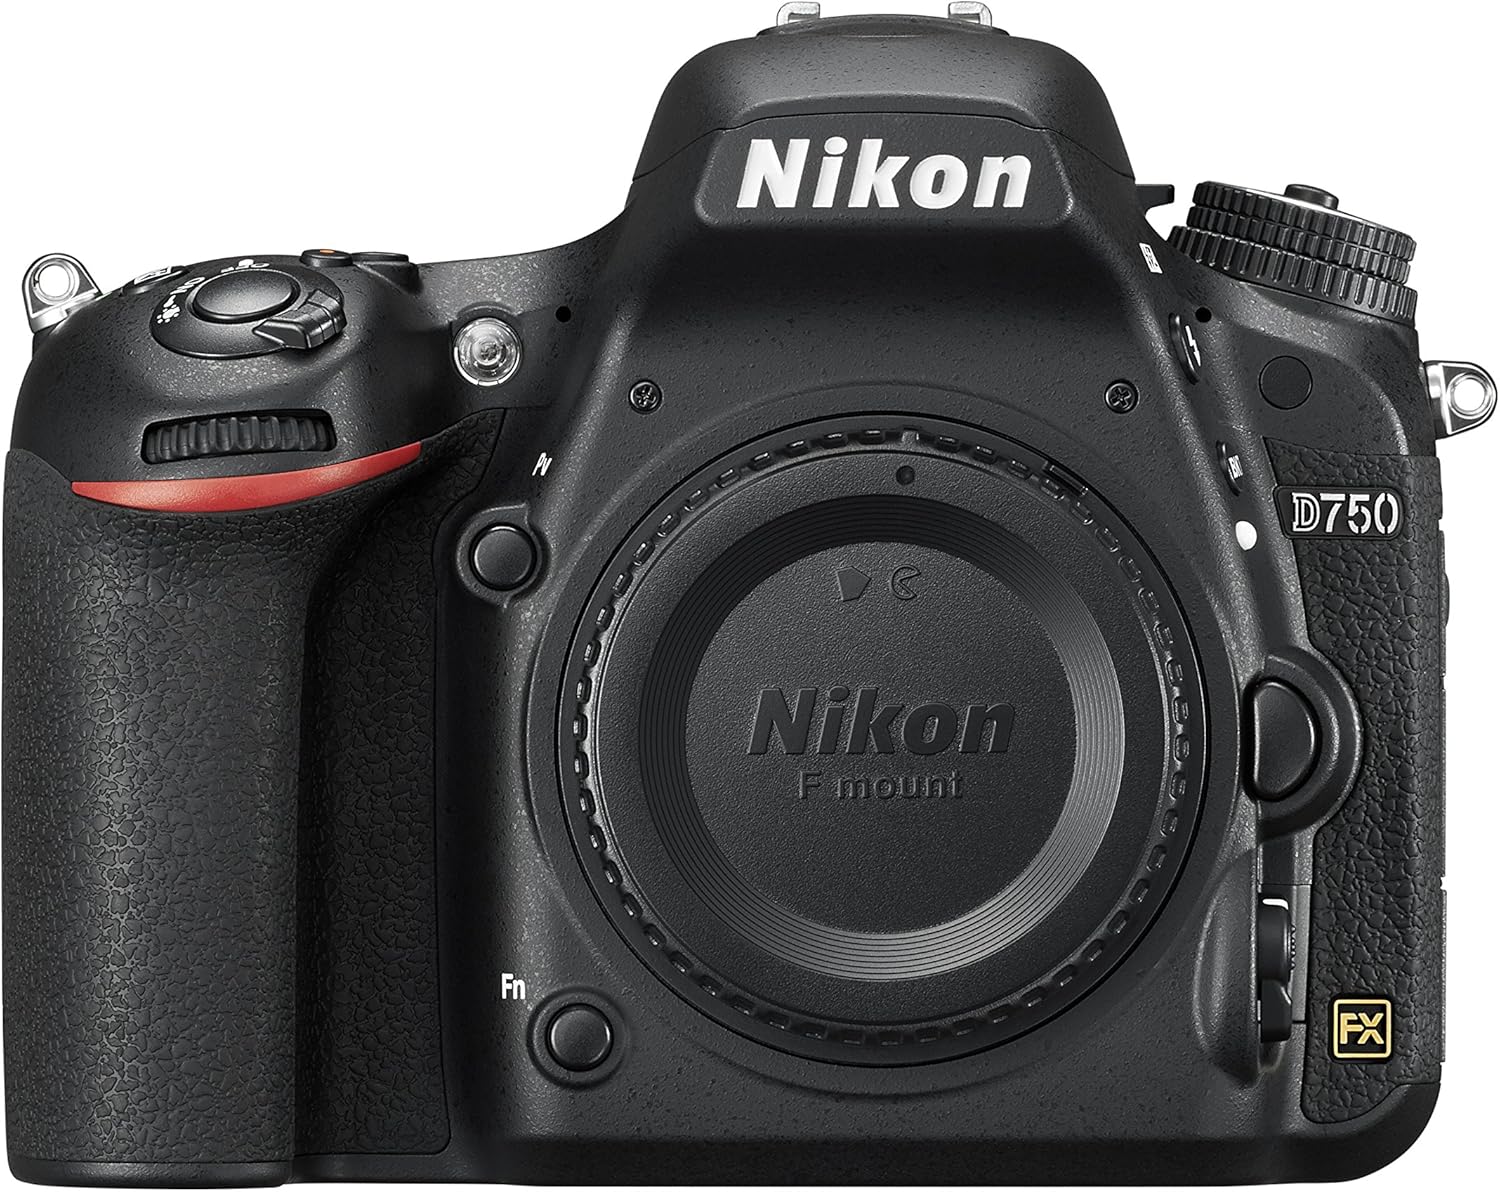
 | Nikon D750: (best Nikon camera for filmmaking on a budget) | View on Amazon |
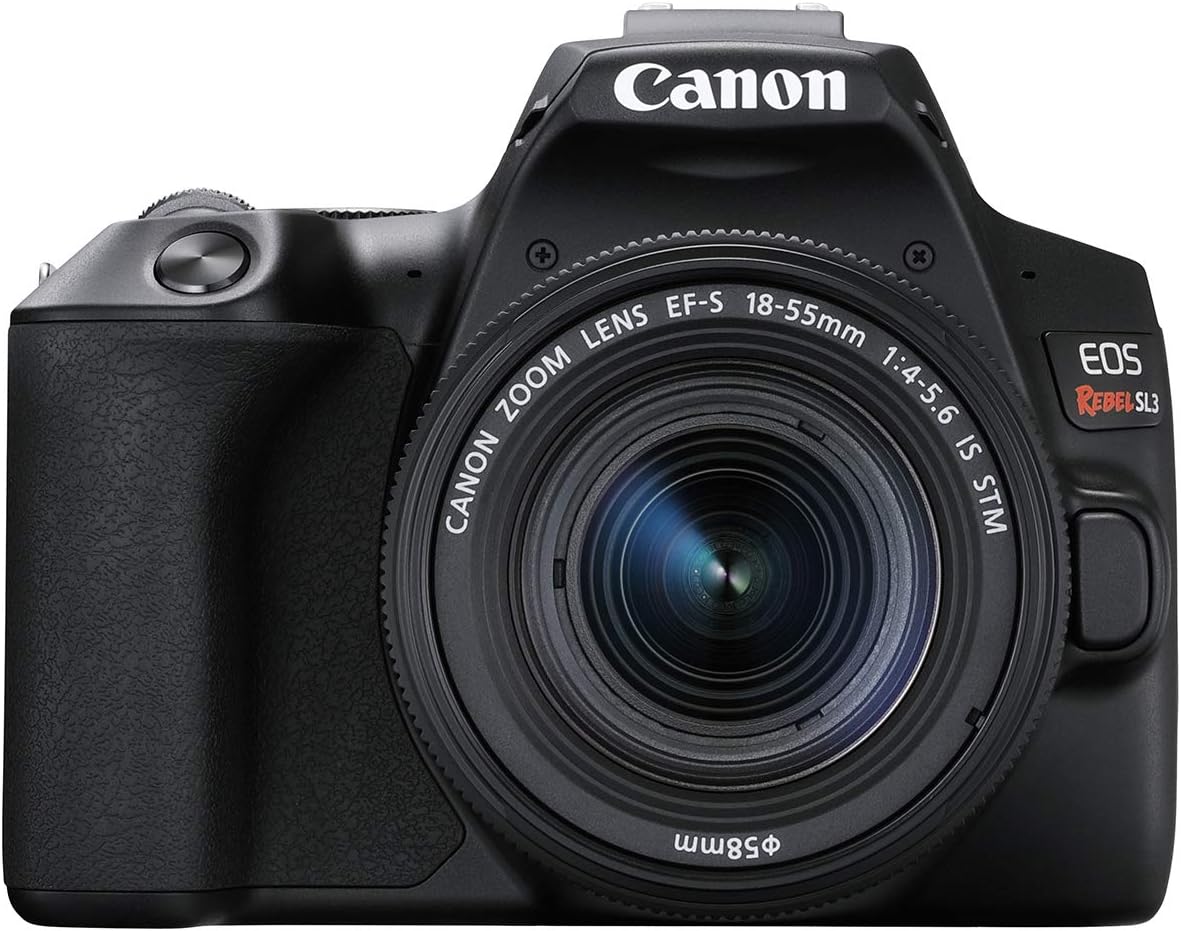
 | Canon EOS Rebel SL3: (best camera for a low budget short film) | View on Amazon |
 | Nikon D3300: (best budget cameras for film students) | View on Amazon |
 | Canon EOS M50 Mark II: (best beginner cinema camera) | View on Amazon |
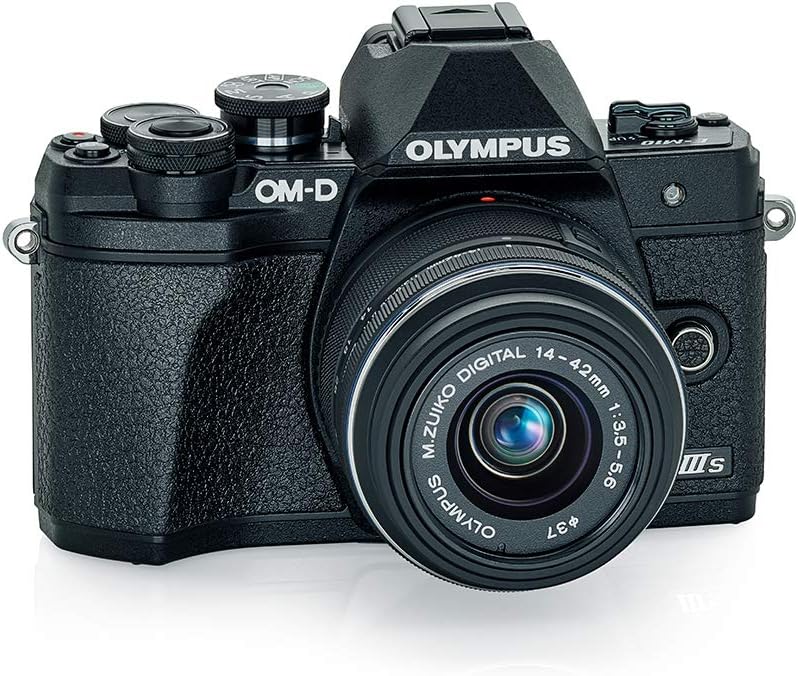
 | Olympus OM-D E-M10 Mark III: (best cheapest 4k camera for filmmaking) | View on Amazon |
Panasonic G85: (best camera for budget filmmaking)

When I joined my videography school, I was passionate about my career.
One day in my school, our teacher assigned a task to make a video of a little girl who lost her way in the jungle and found her way home.
It was challenging, but I was excited to take it on.
I set out with my Panasonic G85, a few lenses, and a tripod.
As I hiked through the woods, I started to shoot various shots of the surroundings.
My camera helped me to capture every minor detail, from the rustling leaves to the sunbeams filtering through the trees.
I set up my camera and took videos of various scenes to bring my vision to life.
Features:
- Model: Panasonic G85
- Sensor: 16MP Live MOS
- Lens Mount: Micro Four Thirds lens mount
- Viewfinder: 2.36m-Dot Electronic
- Lens: Lumix G Vario 12-60mm f/3.5-5.6
- ISO: 25600
- Screen: 3.0″ 1.04m-Dot Swivel LCD Touch
- K Video Recording: UHD 4K at 30/24 fps
- AF System: DFD, 4K PHOTO Modes
- Image Stabilization: 5-Axis Dual I.S
- Connectivity: Built-In Wi-Fi
ISO/ Shutter speed:
I want to capture the essence of her surroundings, including the low light and shadows of the trees.
To do this, I adjusted my camera ISO to 800, allowing me to shoot in darker environments without compromising the quality of the footage.
Then I applied the shutter speed of 1/60th of a sec to capture the girl’s movements and the environment’s surroundings.
Aperture/ Depth of Field:
I opened the aperture to wide settings to capture the beauty of the woods and emphasize the focus on the little girl.
This allowed for a shallow depth of field, blurring out the background and drawing the viewer’s attention to the little girl.
This also dramatically affected the final footage and captured the girl’s emotions and journey in the woods.
White balance/ Frame rates:
I used my camera’s manual mode by adjusting the color temperature to 5500k to capture the accurate colors of the trees and sunbeams filtering through the trees.
I chose a 24fps frame rate for a cinematic look, and I was amazed by the quality of the footage I got.
Why is this camera the best?
It is one of the best cameras for budget filmmaking I have ever bought.
This camera has impressive video capabilities and helped me to capture the immense details that make my film outstanding.
The camera has impressive autofocus and image stabilization features that helped me focus on my subject, and I grabbed smooth and steady shots of the actress, even as she walked through the woods.
Conclusion:
Thanks to this camera, I created a compelling short film that earned me top marks on my assignment.
From then, this camera became my go-to for all future filmmaking projects.
Moreover, it’s still a unique tool in my filmmaking arsenal today.
Click here to buy!
Blackmagic Pocket Cinema Camera 4K: (best cameras for budget filmmaking)

When I was in college, where I studied filmmaking, I still remember the task me and my friends got from our teacher.
He asked us to videotape the old city to show how the people live, eat and carry themselves in their surroundings.
It was quite a new experience for us to shoot videos in a natural environment.
At that time, my friends and I invested little in a camera to learn the skills.
That was none other than BlackMagic pocket cinema camera 4k.
When we started filming there, the streets were bustling with life, and every corner held a unique story.
I wandered through the narrow streets to capture each detail that caught my eye.
Features:
- Model: Blackmagic Pocket Cinema Camera 4k
- Sensor: 4/3″-Sized HDR
- DCI 4K60, 2.8K80 Raw in 4:3 Anamorphic
- Dual Native ISO: 400/3200 up to 25,600
- Lenses: 2.6K 120 Raw for Super16
- Display: 5″ Touchscreen
- Lens Mount: Active Micro Four Thirds
- Dynamic Range: 13-Stop, 3D LUT Support
- Shutter type: Electronic rolling shutter
ISO/ Shutter speed:
I started with low ISO settings, such as 200, to minimize noise and grains in the videos.
Where I needed to increase it, I gradually increased it to an optimal level until I got proper exposure.
Then I increased the shutter speed to 1/250th of a sec to freeze any movements of people or other things.
Aperture/ Depth of Field:
Then I chose a medium aperture at f/11 that provided enough depth of field to keep my subjects in focus.
White balance/ Frame rates:
To match the natural lighting condition of the surroundings, I set the white balance using a gray reference card. It helped me to avoid any color tints and accurately capture the warm tones of the refreshing sunlight.
Then I opt for a 30fps frame rate to capture smooth videos and to make the film more vibrant.
Why is this camera the best?
The camera offers 4k footage with a high dynamic range and a wide color gamut which helped me to take exceptional-quality videos of the city.
It’s an incredible feature to shoot RAW, and ProRes allowed me greater flexibility in post.
Conclusion:
This camera is known as one of the best for budget filmmaking due to the professional-level features it offers to users.
This camera offers excellent features that are typically found on more expensive cameras.
It is also lightweight and compact, which helped me carry it along the way to shoot in the city’s narrow streets.
Click here to buy!
Canon XA60: (best camera for budget filmmaking)

I got to film the Walk of Women on Women’s Day a few days back.
It was a crisp early morning that day, and I was armed with my trusty camera Canon XA60.
I had been planning this day for weeks and was excited to capture these moments.
When I reached the city’s heart, the streets were already bustling with activity.
Women from all walks of life were out and about celebrating their day.
I started filming the women I encountered on the streets, asking them about their thoughts and feelings.
Next, I headed to the local community center, where a group of women was gathered for a special event.
I filmed their speeches, songs, and dances and was struck by the passion and determination that radiated from every one of them.
Features:
ISO/ Shutter speed:
As this was daytime and there was enough natural light, keeping ISO at 100 to keep the scenes crisp and capture the surroundings’ details with perfect exposure.
Then I kept the shutter speed at 1/250th of a sec.
Fast shutter speed also helped me to avoid overexposure to videos.
Aperture/ Depth of Field:
I applied various aperture settings to get the desired depth of field.
To film the walk and capture women’s movements, I kept the aperture between f/5.6 to f/11.
White balance/ Frame rates:
I set the daylight mode on my camera to avoid any color casts in the final footage due to the various lights in the surroundings.
Then I selected the frame rate of 24fps to create a film-like look.
Why is this camera the best?
This camera features a large 1-inch sensor through which I can capture high-quality videos with low noise, even in extreme low-light situations.
It also features a wide-angle lens with a large aperture, allowing me more creative control over the depth of field and achieving a cinematic look.
Conclusion:
This camera is one of the best for budget filmmaking and a versatile option.
This camera has a 15x wide zoom lens with an aperture range of 2.8/4.5.
This allows for creative depth of field control and makes it easy to create stunning footage in low-light situations.
Click here to buy!
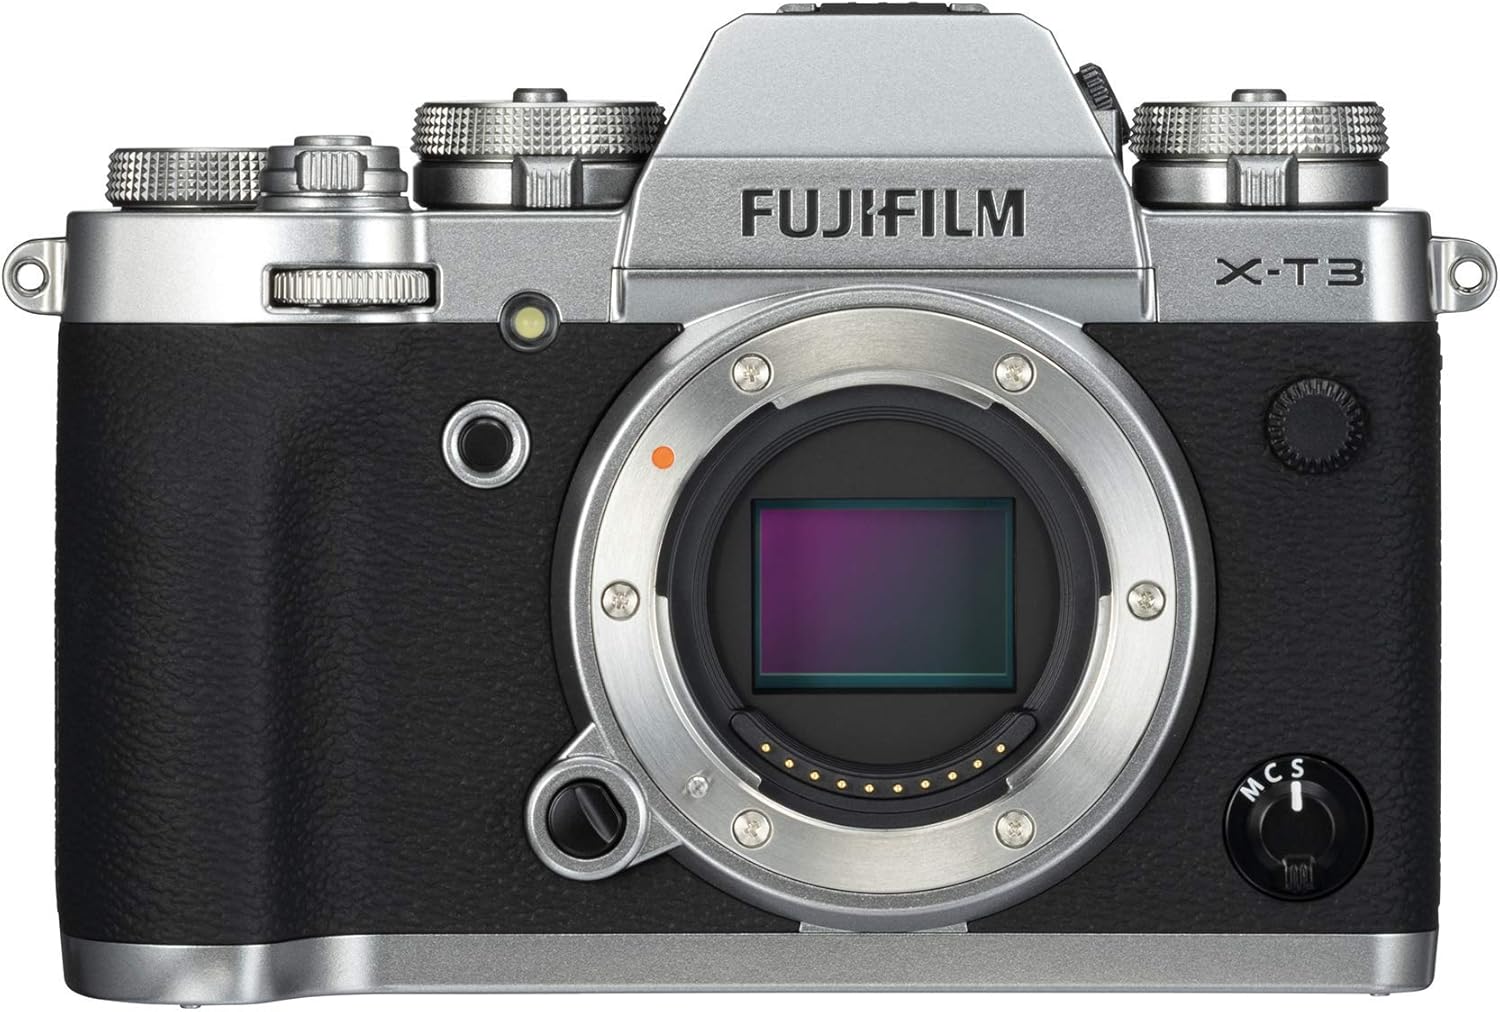
Fujifilm X-T3: (best camera for low budget filmmaking)
Since I was young, I began writing novels and had ideas about proposing stories in my mind to the screen.
I am anxious about genres such as fiction, crime, and suspense.
With the theoretical knowledge about the film, which I understand from the University of Greenwich, and some confront in writing articles and novels, I realized I could write a majestic film and bring it to the screen.
Taking a strong passion for making a film, my friend and I started working on it.
I wrote a strong script for “Good vs. Evil.” Now the second gadget was to choose the best camera.
We had a low budget, so we needed a reasonably priced camera with high-quality features.
After searching different websites, we got our hand on Fujifilm X-T3 and found it the best camera for low-budget filmmaking.
Please have a look at its features.
Features:
Astounding Viewfinder:
With its electronic viewfinder, I cover the area of the Subject quickly because 100fps* gives a smooth display and lets me precisely identify subject movements and focus positions.
I can quickly shoot the filmmaking in the best way.
Best camera for Filmmaking with Fast and Quiet Autofocus:
I found it the best camera to increase the phase-detection AF area to the whole frame with 2.16M phase detection pixels, making it the best for filmmaking.
I can even shoot in low-light situations with high-speed AF and its low-light AF sensitivity that has expanded from -1EV to -3EV.
I can focus accurately to get excellent results from a film shoot.
4K Video Recording:
It is the best part of this camera for making the film.
It never dissatisfied me with its quality because, besides the versatile still shooting modes, it also supports recording 4K/60P 4:2:0 10bit video.
I can operate a built-in stereo microphone during recordings with cleaner audio quality.
Why is this camera best?
It’s a versatile camera because of its multimedia flexibility, high-speed performance, and more-than-capable imaging.
Its newly developed image sensor delivers high-resolution stills and 4K video.
Conclusion:
The Fujifilm X-T3 camera has advanced, durable features and high and best quality results.
I found it perfect for shooting a film on a low budget.
Order it now!
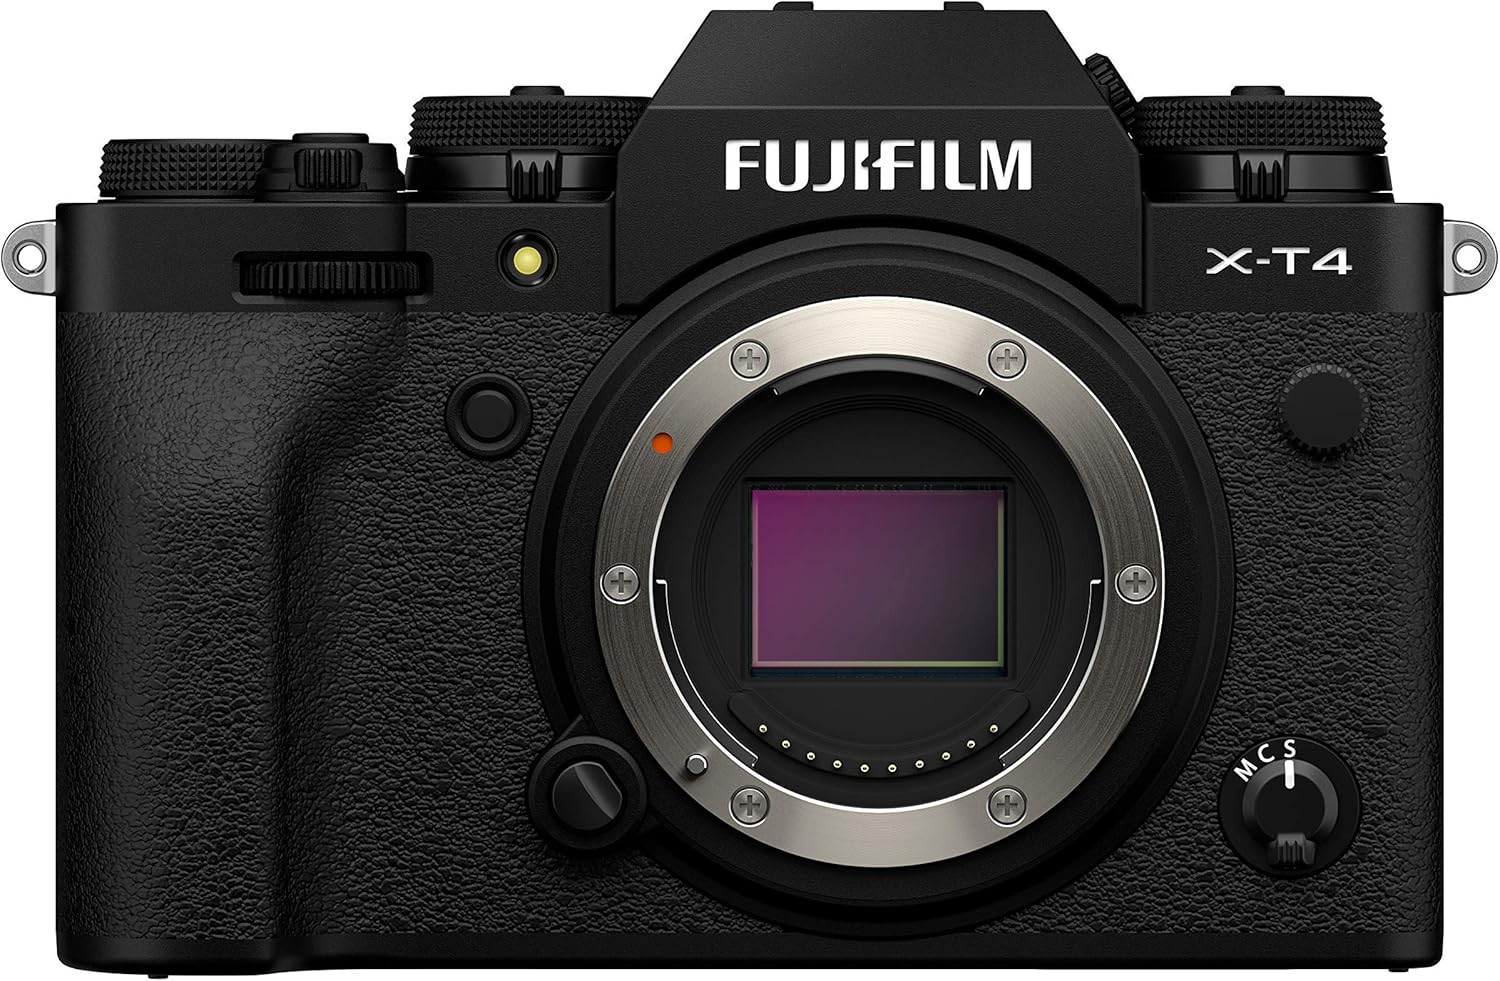
Fujifilm X-T4: (best affordable 4k camera for filmmaking)
After achieving an Academy Award for best picture and best photographer award in a local award show, I had brought a lot of confidence in shooting a film because I desired to become a famous filmmaker when I was young.
I decided to make a film on Jurassic World.
I had to show the functional theme park featuring dinosaurs, which was then thrown into mayhem when a genetic hybrid popular as the Indominusrex breakout was contained.
To shoot my animated film in the best way, I wanted a camera that fulfilled all my requirements.
After exploring different markets, I landed on Fujifilm X-T4, the best affordable 4k camera for filmmaking.
It amazingly surprised me with all its unique features.
I shot my whole film with it and won a prize for shooting such a fantastic film.
Please have a look at its features
Features:
Best 4K camera with 26.1-megapixel:
I had a problem with blurriness while shooting fast-moving objects.
Still, when I got this masterpiece, all my worries vanished because it has a 26.1-megapixel X-Trans CMOS 4 sensor that offers incredible detail and gorgeous enlargements with amazing 4K videos.
It helps me balance the high resolution even after trimming, cropping, or printing huge-size pictures.
ISO 160 – 12,800:
It allows me to shoot in low light with an ISO 160 – 12,800.
I don’t need to be upset about the weather or day or night timings while using it because it has a broad spectrum of lightning situations which offers me to shoot ideally just before midnight when the light available is often mesmerizing but scary.
I can enjoy crisp and clear videos with a bright, high-contrast viewfinder, making it best for filmmaking.
White balance:
This camera outperformed my expectations with its superb results.
The white balance feature of this camera offers me accurate and natural tone shoots regardless of lighting situations.
The processing power comes in various formats that I require to make outstanding and engaging 4K filming videos.
Why is this camera best?
This camera perfectly suits me as a filmmaker because it brings in-body stabilization, upgraded autofocus, and quick shooting. It can blend unique stills and video capabilities along with improved workflow.
It offers me fast and precise AF performance.
Conclusion
The outstanding features of this Fujifilm X-T4 camera are a must-have gadget for my photography kit.
It can help me wonder like never before in the filmmaking world.
Buy it now for the best video films!
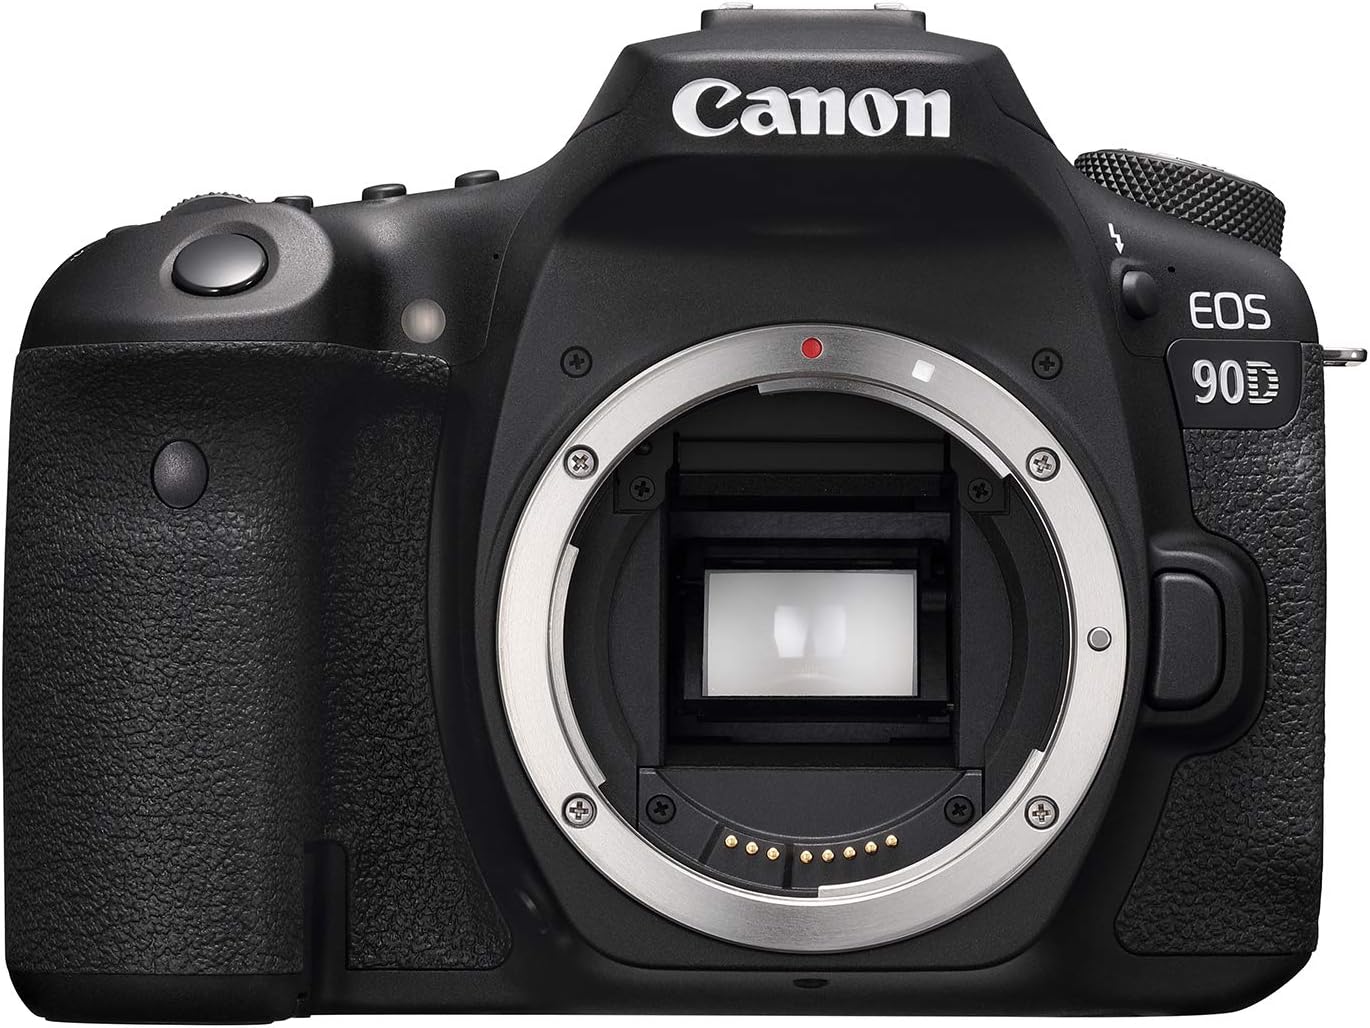
Canon 90D: (best budget DSLR for filmmaking)
Filmmaking is making a film or an audiovisual work of art that shoots the motion of environments, characters, and camera movements in concert with sound with diegetic and non-diegetic sources.
A filmmaker’s job is to assemble those images and sounds using cameras and sound recording devices.
I am also a professional filmmaker and have given many blockbuster movies.
Last year, I decided to shoot my next film in the U.S.A. I chose Los Angeles, California.
I went to this beautiful place with my entire team and shot all my films with Canon 90D, the best budget DSLR for filmmaking.
Because of its versatile nature, I always prefer this camera for shooting all my films.
Please have a look at its features
Features:
Best Camera for Filmmaking with Wide AF Area Coverage:
I can easily cover a broad area during shooting film with fast and impressive focusing and comprehensive AF area coverage, even when my Subject is way off-center.
It allows me to capture the best shooting clips because of its expansive focus area of approx—88% horizontal and 100% vertical.
4K (UHD) 30 fps:
I can even shoot the best high-resolution videos with this all-rounder camera.
I achieve detailed and eye-catching videos because they feature uncropped 4K (UHD) 30p and Full HD 120p video.
It allowed me to record sprawling cityscapes and, more in total, wide-angle views, making it an ideal choice for filmmaking.
Dual Pixel CMOS AF:
I love this camera feature because it allows me to take the best shooting of the film.
I get fast and accurate autofocus right as the moment happens with its excellent Dual Pixel CMOS AF.
The Eye Detection AF can easily detect and focus on my Subject’s eye for natural movies.
Why is this camera best?
This camera is perfect, with a higher-resolution sensor and exquisite raw image quality.
It gives competitive live view AF with 4K video capture, all in the same package.
It gives outstanding movie results with good megapixels.
Conclusion:
The Canon 90D camera will let you breathe in comfort with its unique features.
The natural and super realistic results are the ultimate goal for every photographer while shooting the film.
Order it now!
Canon EOS M50: (best video camera for low budget filmmaking)

When I was in my childhood, people would ask me what I wanted to be when I became mature, and I always had an answer for them: I wanted to be a Filmmaker.
This may be the number one art in filmmaking, so taking multiple classes on filmmaking is necessary.
Luckily when I grew up, I pursued my dream as my career, and now, I am a professional filmmaker.
I have continued my career in the best way.
Many top-notch film directors hired me for the shooting of their films.
I have always admired the quality of my work, and it all becomes possible because of my Canon EOS M50, the best video camera for low-budget filmmaking.
Please have a look at its features.
Features:
4K & Vertical Video:
I always get clear and natural results while shooting the film because this camera offers me take benefit of recording 4K movies at a frame rate of up to 24p with high definition and high-quality results.
I found it a great camera because I achieved interesting and fantastic videos by mixing my shot length and angles.
Best Video camera with combination IS:
Whenever I have to shoot walking actors or any moving object, I can achieve full-focused and explicit videos by preventing the problem of camera shake.
I obtained the best-stabilized videos because of their built-in 5-axis digital image stabilization.
I can effectively stabilize my films with a low budget using this camera.
Dual Pixel CMOS AF:
Due to its versatile Dual Pixel CMOS AF, I get smooth and rapid focusing performance in my videos whenever I have to shoot my films.
I can ideally shoot the live view with rapid and smooth autofocusing.
Why is this camera best?
This camera best features 4K/24p video capture (with a 1.7x crop), Wi-Fi NFC, Bluetooth, the latest DIGIC 8 processor, and Dual Pixel AF coverage.
I can get stabilized videos with its image sensor, making it an ideal choice for filmmaking purposes.
Conclusion:
The Canon EOS M50 is outstanding if you are looking for the best video camera within your budget for filmmaking.
It always satisfies me with its high performance.
Now it’s your turn to enjoy the perks of this camera.
Order it now!
Sony A6400: (best budget Sony camera for filmmaking)
I had spent my last year’s vacation in Chicago, Illinois.
It is the most beautiful and largest city in the U.S.A.
It is famed for its bold architecture and its skyline punctuated by skyscrapers.
The Windy City had truly blown me away through the longest skyscrapers, the artwork, and the outstanding food.
I visited the John Millennium Park, Hancock Center, and the Navy Pier to catch the whole experience of Chicago.
As this city is well-known for its architecture, I decided to make a short film about the beauty of this city.
I took my Sony A6400 on my shoulder and went to shoot its Sears Tower and museums.
Because of my Camera, I made a beautiful short video film, making it the best memory.
Indeed it is the best budget Sony camera for filmmaking.
Please have a look at its features.
Features:
Advancements in Image Quality:
It always delivers improved video quality and color reproduction in all shooting conditions because the 24.2MP APS-C image sensor is paired with an enhanced BIONZ X processor.
I can obtain sound noise reduction at Standard ISO ranges expandable to 100 – 102400 for stills and movies.
Fast Hybrid Autofocus:
This versatile camera allowed me to shoot amazing film videos because of its fast hybrid autofocus.
I use this camera to achieve high-quality 4K footage with detail and depth in my videos.
It assures internal 4K UHD video recording with full pixel readout and no pixel binning to gather about 2.4x the data needed for 4K movies.
Its autofocus is just outstanding.
Best camera for filmmaking with High Resolution:
All the videos I shot with this camera have a high resolution because they feature a front-end LSI that assures impressive and continuous shooting at 11fps3.
It gives me remarkable quality and high resolution, making it the best camera for filmmaking.
Why is this camera best?
This all-rounder camera is easy for sharp photos, 4K videos, and filmmaking.
It has high performance with incredible autofocus.
It is the best camera for filmmaking.
With its compact and portable design, I can take it anywhere.
Conclusion:
I had a tremendous experience with this Sony A6400 camera.
It assures me of the best filmmaking.
It never disappoints me with its results or quality.
Its advanced features don’t let me down in any condition.
Try it yourself and Order!
Panasonic GH5s: (best budget camera for documentary filmmaking)
I was assigned to make a documented short film on any social issue during my educational career.
I chose the most emerging topic in our society, i.e., Drug Abuse.
It is referred to as the consumption of banned drugs or prescription or over-the-counter medications for motives other than those for which they are aimed to be used or in immoderate quantities.
It may embark on emotional, social, physical, and job-related issues.
After selecting the character of drug addictive person, I had to choose the best camera.
Luckily, I got my hand on Panasonic GH5s and found it the best budget camera for documentary filmmaking.
I made an inspiring documentary on the issues of these drug-additive societies and got admired by my professors.
Please have a look at its unique features
Features:
10.2-megapixel Micro Four Thirds sensor:
While shooting documented film, I benefited from its t10.2-megapixel Micro Four Thirds sensor that allows me continuous shooting with its impressive low-light quality and quick readout speed.
While shooting at high ISO values, the sensor’s back-illuminated design provided smooth quality in my videos, making it an ideal choice for documentary filmmaking.
UHD 4K Video Recording:
It never let me down with its quality because, besides the top-notch still shooting modes, it also supports recording UHD 4K video.
I can achieve a built-in stereo microphone during recordings with cleaner audio quality.
The video films I got with this masterpiece are high quality and high resolution.
Depth-From-Defocus AF System:
This fantastic camera fulfilled all my requirements during filmmaking with its accelerated autofocus performance and DFD (Depth-From-Defocus) technology.
I can shoot everything I see with its live viewfinder precisely.
Why is this camera best?
This camera can amazingly shoot stills and videos with complete focus on the Subject because of its 10.2-megapixel Micro Four Thirds sensor and ultra-wide dynamic range.
Its weather-sealing construction makes it perfect for filmmaking.
Conclusion:
If you want something perfect to make your video films more magnificent without sacrificing quality, the Panasonic GH5s camera is just for you.
Click the link below to order.
Canon 5D Mark III: (best Canon camera for filmmaking on a budget)

I am a filmmaker, and I like to make videos to share them with my audiences.
For me, there are so many reasons for filmmaking.
The first is that I love storytelling, and I think that telling stories can be essential because I can share my knowledge, but it’s also just fun to tell stories about characters about people, and it’s just a good time.
Secondly, it made me able to take a vision I have in my head and see it with my eyes and hear it with my ears; that is so cool.
They are a great way to learn about people, whether through a character or a documentary.
It brings happiness to me. I shoot all my films with Canon 5D Mark III, the best Canon camera for filmmaking on a budget.
Please have a look at its features.
Features:
22.3 MP Full-Frame CMOS Sensor:
This camera gives me an advantageous increase in overall resolution without sacrificing sensitivity because of its newly developed 22.3MP full-frame CMOS sensor.
I can comfortably rely on my camera for any shooting.
I found it the best camera for filmmaking because it allowed me to shoot the moving bodies with high resolution and without blurry effects, even in low light.
Best filmmaking camera with High-Density Reticular AF:
I never have difficulty focusing on my Subject because of its High-Density Reticular AF.
It satisfies all my needs to get my Subject into proper focus.
It’s a game-changer camera when it comes to shooting the best film.
Dual Pixel RAW:
This camera allows me to shift the focus of a photograph after it has been shot.
The Dual Pixel RAW in the camera helped me get clear and focused results even in a crowded area.
I can bring extra details, shift the bokeh effect and decrease the impact of ghosting in my videos.
Why is this camera best?
This camera is best because of its faster-shooting speed, high ISO performance, good LCD screen, more AF focus points with more cross-type sensors, more delicate battery life, and portable body.
I consistently achieve greater accuracy and outstanding results in video films.
Conclusion:
This remarkable camera presents all the unique features required for the best filmmaking.
It would help if you purchased Canon 5D Mark III to shoot your next film in the best way.
Here is the link, click and order!
Nikon D750: (best Nikon camera for filmmaking on a budget)
I am lucky to have some fantastic friends who are super fun to be around and like to travel.
I always wanted to go on a road trip with them, and finally, it was fulfilled when I reached the 12th grade.
We all suggested different places for a road trip and decided to go to Orlando, Florida.
Orlando, Florida, is around ten hours away from our place, so we planned to go for a night’s journey.
The driver who joined us was proficient at driving in hilly areas and knew about various site-seeing places.
I decided to make a film on my first road trip experience with my Nikon D750, the best Nikon camera for filmmaking on a budget.
This fantastic camera made my voyage more memorable by shooting it smoothly and beautifully with its unique features.
Please have a look at its features
Features:
Full HD Video Recording:
This stunning camera allows me to shoot amazing films on roads with beautiful sights.
I have high-resolution access to the best video quality because this camera assures me Full HD Video Recording.
It delivers clarity and versatility to my videos.
I benefited from its full HD 1080p video recording in multiple frame rates up to 60 fps and EXPEED 4 processing power during filmmaking.
24.3MP FX-format sensor and EXPEED 4:
When I shot my first video with this camera, it surprised me with its versatile mixture of high sensitivity, fine video quality, and fast overall performance because the full-frame, FX-format 24.3MP FX-format sensor is connected with an EXPEED 4 image processor.
I may work in various lighting situations due to a native ISO 100-51200 sensitivity range, making it best for shooting films.
Compact & lightweight:
I found it the best camera for shooting video films because of its compact and lightweight features.
I got a chance to make a film on adventurous things during a road trip due to the versatility of my camera.
I continued my voyages with this highly durable and scratch-resistant camera.
Why is this camera best?
This is a tremendous camera with its lightest FX weight other than the Df, and it delivers outstanding AF performance and image quality in any light situation.
It is best to film a camera on a budget.
Conclusion:
My experience with this camera is impressive, as I shot many of my best moments with it.
If you want to invest in something good, I suggest it to you all.
Click the link below and order it!
Canon EOS Rebel SL3: (best camera for a low budget short film)
The beauty of nature always attracts me to it.
Onc,e I got to visit the Tongass National Forest, Alaska.
It is the largest forest in the U.S., occupied by many endangered species.
I was there to explore the beautiful scenery of this place and make a short film about it.
As I walked through the mesmerizing forest, I was greeted with the fresh smell of the scented flower.
Their bright colors glowed in the sunlight.
The chirping birds happily danced around the sky as the trees enthusiastically waved their arms.
The warm spring breeze softly brushed against my face as I walked along the freshly grown grass.
The refreshing air landed on my tongue and filled me with happiness.
I made a short film on the enchanting beauty of this forest with my Canon EOS Rebel SL3, the best camera for a low-budget short film.
Please have a look at its features.
Features:
Best Camera for Short Film with Dual Pixel CMOS AF:
With its Dual Pixel CMOS AF, this fantastic camera offers me fast and accurate focusing even in difficult lighting situations.
I get the best film shots of nature with better precision in low-contrast and mixed-lighting conditions due to the cross-type design of the sensors.
It becomes my companion because it is with me to explore the world’s beauty in all my journeys.
24.1 Megapixel CMOS (APS-C) Sensor:
I can shoot high-resolution images and beautiful 4K videos of natural beauty with its powerful 24.1 Megapixel CMOS (APS-C) sensor.
It allowed me to shoot videos with better details and dynamic, sharp colors.
I can confidently shoot short films because it is always there for me to produce stunning results.
Optical Viewfinder:
I can shoot the area of the Subject quickly with its optical viewfinder because it delivers a smooth display and offers me to identify subject movements and focus positions precisely.
Ideally, I can shoot the Subject to fit into the frame, making it the best choice for shooting short films.
Why is this camera best?
This camera is very competent with its high ISO and incredible autofocus.
It allows me to shoot the aesthetic beauty of nature. It can shoot a variety of subject matter in all sorts of lighting conditions.
Conclusion:
All your troubles and pains of perfect shooting can remove in one go with this amazing Canon EOS Rebel SL3.
This camera brings you a great bundle of happiness.
Here is the link below. Order it!
Nikon D3300: (best budget cameras for film students)

It was a battle of the bands in my college, a music contest in which more than two bands participated in the championship of “best band.”
Students from different colleges also came to take part in this battle.
Being a famous college photographer, my job was to cover this music contest.
All the students were gathered in the auditorium to enjoy this contest.
After the thriller competition, our college band won the title of the “best band.”
Besides the bragging rights, the winning team got a prize.
I shot this exciting event with my Nikon D3300, the best budget camera for film students.
Please have a look at its features
Features:
Optical Viewfinder:
With its optical viewfinder, I shoot the area of the Subject quickly because it delivers a smooth display and allows me to identify subject movements and focus positions precisely.
I found this camera best for shooting distant objects because the viewfinder accurately focused on my Subject, making it the best camera for filmmaking.
Perfect Autofocus:
I can even shoot in low-light situations with high-speed AF because of its low-light AF sensitivity.
Whenever I have to capture portrait photos, it focuses accurately and provides an appealing and pleasant bokeh effect.
The high resolution with the incredible autofocus makes me love this masterpiece.
Continuous shoots:
This camera excites me to shoot with its highly comfortable hold and versatile nature.
I can use it for fast action shoots because it shoots up to 5.0 fps during continuous shooting.
I can easily focus with accuracy and achieve exceptional results.
Why is this camera best?
This versatile camera is the best option for all types of photography.
It provides 24.2 megapixels with good image and video quality within budget.
It makes my shoot so comfortable.
Thanks to its ease of use, quality results, and low price.
Conclusion:
The Nikon D3300 camera is built with durable elements, maximizing its performance.
The high-resolution videos make it a perfect option to upgrade my filmmaking skills.
Click the link below to order.
Canon EOS M50 Mark II: (best beginner cinema camera)

A good film can entertain us by refreshing our mind’s tiredness without any evil influence.
During my academic career, I participated in a film-making competition.
It was challenging for me to win this competition because I was known as the best scripter in the college.
All my group members put a whole effort into making this film blockbuster.
Everything was going perfectly, but when it came to shooting the film, we faced different problems with our camera.
We decided to buy a new one. And fortunately, we bought Canon EOS M50 Mark II, which became a game-changer.
With effortless functioning, it gave us smooth and clear videos. We did the whole shoot with it.
When the film was played on the cinema screen, it amazed everyone.
I am in love with this camera. Indeed it is the best beginner cinema camera.
Please have a look at its features
Features:
24.1 Megapixel (APS-C) CMOS Sensor:
I get great 4K video clips with this camera because it features a full-frame CMOS sensor that records approximately 24.1 Megapixels.
This notable camera helps me get outstanding results by improving my photography skills to become a professional filmmaker.
It delivers clear and detailed results even in low-light situations.
Enhanced Dual Pixel CMOS AF:
I loved every second of using this camera; I got quick and accurate focusing even in difficult lighting conditions.
Due to the sensors ‘ cross-type design, I get the best shots with greater precision in low-contrast and mixed-lighting situations, making it ideal for a cinema camera.
Combination IS:
I am proud of myself for buying this camera because it made it possible to eliminate my camera shake problems with its powerful combination IS.
I can prevent my videos from blurriness and continuous shakiness of the camera.
Shooting cinematic videos offer me to shoot every moving individual with stability.
Why is this camera best?
This camera is best with its maximum shutter speed and 24.1-megapixel sensor.
It allows me to shoot low-light situations ideally.
Its continuous autofocus and buffer depth make it best for shooting cinema videos.
Conclusion:
This Canon EOS M50 Mark II is constructed with advanced features that make my videography more appealing.
Do not miss the chance to get yourself with such an incredible camera.
Click the link below and get it NOW!
Olympus OM-D E-M10 Mark III: (best cheapest 4k camera for filmmaking)
Last month, I visited Golden Gate Park, San Francisco, with my family.
It is a large urban park located in California, United States.
Beautiful and colorful flowers surround the park.
It contains paths, a playground, restrooms, large lawn areas, and a basketball court.
There is a monument to past President McKinley at its east end.
The multi-use pathway on the north side of the Panhandle is a famous pathway for bicyclists traversing beyond the city.
Thousands of butterflies were flying there that presented a very mesmerizing view.
I brought my Olympus OM-D E-M10 Mark III and made a short film on this place.
My camera did this job perfectly because it is the cheapest 4k camera for filmmaking.
Please have a look at its features
Features:
Ultra HD 4K Video:
I can record video with high resolution and precise results because of its UHD 4K video recording at 120 fps.
I always get appealing and smooth videos while using this camera, making it ideal for filmmaking.
In-body 5-axis image stabilization:
Due to its compact, lightweight body.
The image stabilization protects my videos from blurriness even when running or walking during the filmmaking.
I always get perfect results because it overcomes my camera shake and hand movement and offers stunning results.
16 MP Live MOS Sensor:
I can shoot the best 4K video films even in low light due to its 16 MP Live MOS sensor.
I love its all-around shooting, impressive low-light quality, and quick readout speeds.
I can cover a wide area and get better results with high resolution and the best video quality.
Why is this camera best?
The best attribute of this camera is its portability.
It always makes me surprised with its accurate focusing and sharpness.
It is an excellent choice for filmmaking, from its class-leading image stabilization to some handy modern video modes.
Conclusion:
This Olympus OM-D E-M10 Mark III offers me stunning 4K videos with super-efficient and advanced techniques.
Its unique features offer me an easy shoot without compromising the quality in any situation.
Click the link below to order!
Lavalier microphones
These microphones are also known as lapel microphones.
These small and discrete microphones can be attached to clothing, making them an excellent choice for interviews, presentations, and other situations where a handheld microphone would be impractical.
These are popular among content creators, broadcasters, and public speakers because they offer high-quality audio capture without needing a bulky or visible microphone.
Whether you’re a professional broadcaster or a beginner content creator, these microphones can help you improve the quality of your audio recordings.
So to find out the best microphones for your professional journey, keep reading our guide.
Boya BY-M1: (Lavalier microphones)

When I started my youtube channel in 2020, I needed help with the audio quality of my videos.
My subscribers complained about the poor sound quality of the films I uploaded.
I was determined to fix the solution, and through deep research, I learned about the Boya BY-M1 microphone.
This mic was affordable and boasted excellent audio quality.
So I decided why not to give it a try.
I still remember eagerly awaiting the arrival of my new microphone, and when it finally arrived, I couldn’t wait to put it to the test.
I plugged it into my laptop, hit record, and started the voiceover for my upcoming video.
Features:
- Model: Boya BY-M1
- Compatibility: Smartphones, DSLRs, and Camcorders
- Microphone: Omnidirectional Condenser
- Noise handling: Low-Handling noise
- Lapel Clip: yes
- Microphone Clip: yes
- Adapter: 1/4″
- Battery: LR44
- Windscreen: Foam
- Sound field: mono
Omnidirectional Condenser:
While shooting my travel vlog, I used this mic as I knew it was an omnidirectional microphone.
I want to pick up ambient sounds, background noise, and my voice.
I want my viewers to get a sense of the environment and atmosphere of the location.
Signal/ Noise:
To shoot my travel vlog, I took advantage of its high signal-to-noise ratio SNR.
Due to this, my voice was higher than any unwanted noise in the background.
I admire its high sensitivity level and grabbed the quiet sounds with great details in my videos.
Foam windscreen:
I used a foam windscreen on my mic to avoid popping sound, wind, and other unwanted noise from the background.
This helped me avoid unwanted noises and distortions and reduce the impact of plosives while recording vlogs.
Why is this mic the best?
This is the budget-friendly omnidirectional Lavalier microphone that helped me to record audio through various applications.
Its 20-foot cable and ⅛” TRRS jack make my jobs more accessible by allowing me to record audio with my laptop, camera, and even on my Android phone.
Conclusion:
The camera features an omnidirectional polar pattern that catches sounds from all directions.
By this, I could record sound without worrying about holding hands for hours.
Due to its low self-noise and high sensitivity feature, I could record clean, clear audio even in a noisy environment.
Click here to buy!
Rode smartLAV+: (for mobile devices)

A few days back, I wanted to record a music video using my mobile.
I wanted to keep it simple and wanted to use something other than fancy cameras or other equipment.
So I decided to record it on my phone.
Luckily, I had a Rode smartLAV+ microphone which I decided to use for audio recording.
I was excited to try out this phone on my mobile as I also used it on my camera and laptop.
I set up my phone on a tripod and plugged my mic into it.
This microphone is small and discreet, which makes it easy for me to move around and adjust as needed.
I started playing my guitar and singing in my microphone, and I was amazed by the quality of the recorded sound.
Features:
Model: Rode smartLAV+
- Purpose: ENG, EFP & Vlogging
- Type: Low-Profile Lapel
- Protection: Windshield, Clip & Durable Cable
- Compatibility: Built-In Mobile Apps
- Pattern: Omni Polar
- Audio quality: Broadcast-Quality
- Jack: Powered via Phone over TRRS
- Sound field: Mono
- Capsule: 1x Electronic condenser
- Diaphragm: 0.10”/ 2.54mm
- Frequency range: 20 HZ to 20KHZ
Frequency:
This mic has a frequency range of 20 HZ to 20KHZ, and I captured the low-bass sounds to high-pitched tones.
This more comprehensive frequency range ensures that all aspects of the audio, including my voice’s natural timber, are captured with accuracy.
Dynamic range:
This microphone’s a wide dynamic range of 80 dB, which I use to record audio through various applications.
It is the difference between the loudest and softest sound that a mic can capture without distorting the signal or introducing noise.
Omnipolar pattern:
I want excellent audio accuracy as I want to capture the tunes of the guitar for the best experience.
Thus this omnipolar pattern is an attractive choice.
It accurately captured my voice’s tones and was gracefully presented in the video.
Why is this mic the best?
This mic captures a wide range of sound frequencies, and I have used it on various applications.
This compatible mic on both IOS and Android devices makes it a versatile option.
Its dedicated app allowed me to adjust the microphone’s gain, EQ, and other settings giving me more control over my recording.
Conclusion:
This mic’s combination of small form factor, high-quality sound, versatility, and compatibility with a wide range of devices makes it a popular and highly regarded microphone among people of each skill level.
It is also an excellent choice for mobile devices to record audio.
Click here to buy!
Wireless microphones
These microphones have revolutionized the way we record audio.
They allowed us to capture the audio without being tethered to a physical connection, giving us more flexibility and freedom in our recording setups.
Whether recording a live performance, conducting an interview, or producing a podcast, these microphones offer many benefits that traditional wired microphones can’t match.
This blog post will closely examine one of the best wireless microphones and why they’re crucial for modern audio recording.
So keep reading to explore the great options and choose the right one for your needs.
Rode Wireless GO II: (dual channel)

Last year I started my YouTube podcast series.
And I knew the key to producing quality content was good audio.
That’s why I invested in the Rode wireless GOII mic.
I clipped the transmitter to my shirt and plugged the receiver into my camera.
Over the few weeks, I recorded several podcast episodes using this mic.
This mic allowed me to focus on my content without worrying about technical issues.
The audio quality was impressive, and it helped me to gain more subscribers and engage more viewers through these podcasts.
I also recorded one episode outside in a busy park.
Surprisingly, this mic picked up my voice crystal clear and blocked out the background noise.
Features:
- Model: Rode Wireless GOII
- Usage: 2-Person interviews, Vlogs & podcasts
- Mic Inputs: Built-In Omni Mics & 3.5mm
- Powerful Features: Customization via App
- Recorders: 2 x Mini Clip-On transmitters
- Output Modes: Stereo or Dual-Mono
- Batteries: 7-Hr Rechargeable + USB power
- Functionality: USB Audio Interface
- Easy Setup with No Menus
- Mics: Up to 8 on Set / 656′ Range
- Audio Recording: 7 Hours of uncompressed
Frequency:
To record a podcast, I first ensure that I have a mic with a wide range of frequencies that is crucial to capture all the nuances of human voices.
This mic’s low end of the frequency range, 50 HZ, captured the deep bass notes of the voice.
The mic’s 50 HZ to 20 KHZ ensures that my voice will sound clear, natural, and lifelike, without muffled or distorted sounds.
Omnipolar pattern:
The omnidirectional mic helped me capture a more natural and balanced sound by picking up the ambient noise and room tones.
Having multiple guests on my podcasts and various people speaking at once was beneficial.
Gain range:
I adjusted my voice and my guest’s voice level that be appropriate for the recording environment.
This mic has a gain range of -24 to 0 dB, allowing me to increase the audio signal’s volume by up to 24 dB or reduce it by up to 0 dB.
Why is this mic the best?
This microphone is considered one of the best wireless microphone systems on the market.
It is easy to set up and use.
It is a versatile mic that can be used on multiple devices, which makes it ideal for content creators.
Conclusion:
Its built-in screen displays the battery life, signal strength, and ability to record audio directly onto the transmitter for added convenience.
It is a top-of-the-line wireless microphone system that offers exceptional sound quality, ease of use, and versatility, making it a must-have for any content creator who values high-quality audio.
Click here to buy!
Rodelink Filmmaker Kit: (wireless microphones)
When I was working with a director, he asked me to join his team for the sound recording purpose for their upcoming film.
The film was going to be shot in Paris, the perfect location.
Its stunning architecture, charming streets, and romantic ambiance attract many filmmakers or producers to work here.
I needed to have the best equipment, so I decided to buy a new microphone.
My friend recommended the Rodelink Filmmaker Kit, as he was also using the same for his assignments and tasks.
I set up my gear and was excited, and I knew this would be a challenging project.
This microphone picked up each sound with precision: the bustling noise of the city, the sound of the seine flowing, the clinking of the glasses at the cafes, and even the faintest whispers of the passerby.
I captured it all.
Features:
- Model: Rodelink filmmaker kit
- Dynamic range: 112dB
- Transmission type: 2.4 GHZ fixed frequency agile system
- Maximum latency: 4ms
- Antenna: internal
- Power source: 2 X AA batteries or micro USB
- Output impedance: RX-CAM- 300 OHM, Rodelink LAV 300 OHM typical
- Signal-to-noise ratio: 67 dB
- Range: up to 100m
Frequency:
I got Clyster clear audio due to the ability of the microphone to record sounds at 35HZ and 22KHZ.
I captured various frequencies, from recording dialogues to ambient sounds and music.
Signal/ Noise:
I could capture the desired audio and avoid unwanted noises due to its 67 Db SNR.
I got a high-quality audio recording with minimal noise or hiss.
A high level of SNR means that the microphone can capture the audio with great accuracy and requires less effort in post.
Dynamic Range:
Its wide dynamic range of 83dB allowed me to capture the subtle nuances of quiet sounds, such as rustling leaves or distant traffic.
This allowed me to create a more immersive audio experience for the audience and helped enhance the film’s overall quality.
Why is this mic the best?
This microphone is lightweight and easy to mount on our camera.
It was the perfect equipment for our shoot, allowing us to move around freely, capturing the audio from any angle we needed.
It comes with various accessories, including a lapel mic, a receiver, and a transmitter.
It uses a 2.4GHZ digital transmission system that provides a reliable wireless connection without interference.
Conclusion:
This is the best choice for everyone needing high-quality wireless audio recording.
It’s user friendly, versatile, and provides superior audio quality unmatched by other wireless microphone systems.
Click here to buy!
Directional microphones and accessories:
Directional microphones are an essential tool for capturing high-quality audio in a range of settings.
These microphones are designed to pick up sound from a specific direction while rejecting sounds from other directions, making them ideal for recording dialogues, interviews, and noisy environments.
However, using a directional microphone alone may only sometimes be enough to achieve optimal audio quality.
This blog post will explore directional microphones and accessories that can improve audio quality, including wind protection, shock mounts, and boom poles.
We’ll also discuss some tips for using directional microphones effectively in various recording scenarios.
Rode NTG-5: (Directional microphones and accessories)

When I started podcasts on my channel, I wasn’t happy with the results of the sound in the final videos.
I was determined to take my show to the next level.
Then I started searching on the internet for the mics.
After days of research, I finally learned about directional microphones to avoid any unnecessary voices in the background being captured.
I have my studio at home, so it was essential to reduce the noise of the other members.
So buying a Rode NTG-5 mic was a good idea.
Then I decided to shoot my next episode with this mic to test this mic.
With everything set up, I hit the record and began to speak into the microphone.
As I listened back to the playback, I was amazed at how clear and crisp the audio was.
Features:
- Model: Rode NTG-3
- Powered: Phantom
- Immunity: Enhanced to RF Interference
- Noise Circuitry: Low
- Sensitivity: High Requires Less Gain
- Boost: Slight Presence & Bass Attenuation
- Noise reduction: Windscreen Reduces Noise
- Housing: Lightweight
Frequency:
This microphone can capture audio of 40 HZ to 20 kHz.
So I could accurately reproduce the sounds in the low, mid, and high-frequency ranges.
So my sound recording was more natural and clear.
Dynamic range:
This microphone has a dynamic range of 117 dB, so I was sure to get clear sound in my podcast.
It captured the range of sound levels without any distortions or noise.
Polar pattern:
The mic has a super-cardioid polar pattern, which helped me reduce any background noises while merely focusing on my voice.
It provides a narrower pickup angle resulting in a more focused and isolated sound.
Why is this mic the best?
It is considered one of the best microphones in its class due to its exceptional audio quality, rugged build, and versatility.
It uses a broadcast-grade shotgun condenser capsule, which provides exceptional audio quality with low noise and high sensitivity.
Its wide frequency range ensures the microphone accurately captures the entire sound spectrum.
Conclusion:
It is a versatile mic used in various applications, including filmmaking, broadcast, and live sound.
It can be mounted on a boom pole or a camera, making it ideal for capturing audio in different settings.
Click here to buy!
Rode Boom Pole: (Directional microphones and accessories)

Last year my friend and I were offered a task to join the team of a music show as audio recorders.
We accepted it and worked hard to make it the best-ever show.
We have to control the audio of the show.
Thus we decided to use a Rode Boom Pole mic.
We tested it before the show started, and it was working fine.
Then we adjusted other settings: the show was about to start, and I could sense the excitement in the crowd.
As the first act took the stage, I lifted the boom pole extending it to the perfect height to capture the vocals and instruments.
It captured every note and tone with precision.
Features:
- Model: Rode Boom Pole
- Thread type: 3.8” -16 MALE
- Sections: five collapsing sections
- Fits: NTG1, NTG2 & Video Mic
- Max length: 8′ / 85.5 cm
- Min length: 10.6′ / 323.2 cm
- Release system: intuitive lock
- Grip: ergonomic
Release system:
One of the benefits of this lock release mechanism is that it ensures that the microphone stays securely in place, even when I am moving around or adjusting to the boom pole’s position.
This was especially important when I was recording audio in challenging environments.
Thread type:
The term 3.8″ refers to the size and pitch of the thread.
In this case, the thread has a primary diameter of 3.8 inches and 16 threads per inch.
Male indicates that the thread is an external thread located outside a cylindrical object and designed to fit into a female-threaded system.
Collapsing sections:
Five collapsing sections allow me to adjust the pole’s length to fit the recording situation’s specific needs and make the pole more compact for storage and transport.
By collapsing the sections of the boom pole, I could adjust the pole’s length to position the microphone closer to or farther away from the sound source, as needed.
Why is this mic the best?
It is made from lightweight yet sturdy aluminum, making it durable and easy to handle.
It can bear the wear and tear of regular use and can last for years.
It is adjustable, allowing you to extend or retract it to the perfect length for the job.
This makes it ideal for recording audio in different settings, whether you are on a film set or recording live music.
Conclusion:
It is straightforward to use, and the locking mechanism ensures that the mic stays at the desired angle.
The pole also features a comfortable grip, making it easy to hold for extended periods.
Click here to buy!
On-camera microphone:
When creating professional-quality video content, having high-quality audio is just as important as having good visuals.
That’s why an on-camera microphone is essential for anyone who wants to produce videos that look and sound great.
Whether you’re a YouTuber, a filmmaker, or a content creator, an on-camera microphone can help to improve the clarity and quality of the audio in your videos.
It can help to ensure that your message comes across loud and clear.
This blog post will examine the best on-camera microphone that creates high-quality video content.
Sennheiser MKE400 MkII: (ON-camera microphone)

I was setting out to record my latest vlog on a particularly windy day, and I knew getting good audio would be challenging.
That’s why I decided to use my Sennheiser MKE400 MkII mic, which I had recently purchased for just such occasions.
I attached the mic to the top of my camera and headed out into the windy streets.
As I started recording, I could immediately hear the difference the mic was making.
Despite the gusts of wind whipping around me, my voice was loud and clear.
As I made my way through the city, I encountered all kinds of noise – traffic, construction, and even a street performer playing his saxophone.
But thanks to the directional design of the mic, it was able to pick up my voice while minimizing all the other sounds.
Features:
- Model: Sennheiser MKE400 MkII
- Condenser: MKE 400 Shotgun Mic
- Clamp: Mini Tripod and Smartphone
- Shots Support: Portrait or Landscape
- Mounting Options: 1/4″-20 and 3/8″
- Run Time: 100-Hour via AAA Batteries
- Gain Control: 3-Stage and Low-Cut Filter
- Wind Protection: Built-In and Shockmount
- Output Cables: 3.5mm TRS and TRRS
- Outdoor Use: with Furry Windscreen
Frequency:
This mic comes with a frequency range of 50 HZ TO 20 KHZ.
This broad frequency range was handy when recording audio in various settings, as it allowed me to capture a wide range of sounds with outstanding clarity and detail.
Dynamic range:
Dynamic range refers to the ability of a microphone to accurately capture a wide range of sounds, from the softest whispers to the loudest screams, without losing detail or clarity in the recording.
Polar pattern:
A polar pattern refers to the sensitivity of a microphone to sound waves coming from different directions.
A super-cardioid polar pattern is a more focused and directional version of the cardioid pattern.
That’s why it picks up sounds from the front and rejects sounds from the sides and rear.
Why is this mic the best?
I like its small, lightweight microphone, making it easy to carry around and use in various recording situations.
This microphone is made with high-quality materials and features an all-metal housing, which helps to reduce handling noise and ensure durability.
Conclusion:
It is a high-quality microphone with various features and specifications, making it a popular choice among content creators and audio professionals.
Its directional design, compact size, and high-quality construction make it a reliable and versatile tool for capturing clear and focused audio in various recording situations.
Click here to buy!
Tripods:
Tripods are essential for any photographer or videographer to capture steady and stable shots.
Whether you’re shooting in a studio, outdoors, or on location, a good tripod can make a world of difference in the quality of your final images or videos.
With so many types of tripods available, it took time to figure out where to start when looking for the right one for your needs.
In this blog post, we’ll look closely at tripods, including their different types and features, and choose the right one for your photography or videography needs.
Benro KH26P:

Last week, I decided to hike in a beautiful forest to capture some stunning images of nature.
Towering trees and babbling brooks surrounded the forest.
I had my camera and my Benro KH26P tripod with me, and I was ready to capture the beauty of the natural world.
As I explored the forest, I saw a breathtaking waterfall cascading down the rocks.
I knew I had to capture the sound of the rushing water and the sight of the mist rising into the air.
I quickly set up my Benro KH26P tripod, extending the legs to their full height to get the perfect angle.
The Tripod’s sturdy construction held my camera steady as I adjusted the settings to get the perfect shot.
Features:
- Model: Benro KH26P
- Capacity: 11 lb Video Head
- Balance Plate: Sliding
- Height Range: 34.4 to 72.6″
- Drag: Continuous Pan, Fixed Tilt
- Leveling Ball: 60mm
- Adjustment: Independent Twist-Lock Leg
- Feet: Dual Spiked Feet & Rubber
- Carrying Case: Padded
- Safety lock: yes
- Head: 60mm half ball
- Counterbalance: fixed
Mounting screw:
The Tripod has a 1 x 1/4″-20 Male with Locating Pin.
It is a small metal pin that protrudes from the screw, designed to fit into a small hole on a camera or accessory to help keep it from rotating or shifting on the tripod head.
Drag control:
This Tripod features a pan; continuous drag control.
This feature allowed me to smooth and continuously pan when filming or taking panoramic shots.
Continuous drag control allowed me to adjust the resistance level when panning the tripod head.
Panning range:
It features a 360-degree panning range which I used to allow for a full rotation of the camera or tripod head horizontally.
This means I could rotate the camera 360 degrees, allowing me to capture a full range of shots and angles without moving the Tripod.
Why is this tripod the best?
It is constructed with high-quality materials, including anodized aluminum legs and a magnesium alloy bowl, making it sturdy and reliable.
It is priced competitively for its features, making it an excellent value-for-money option compared to other tripods with similar capabilities.
Conclusion:
Despite its sturdy construction, it is lightweight and compact, making it easy to carry around on photography expeditions.
It has an easy-to-use leg-locking system that allows for quick and easy setup.
The Tripod’s ball head is also easy to operate, with adjustable tension and a separate pan lock.
Click here to buy!
Manfrotto 502 aluminum tripod:

One of my friends asked me to shoot videos of his wedding day, and as he knows my photography skills, thus he said he only trusted me.
I agreed, grabbed my Manfrotto aluminum tripod with my top-quality camera, and headed to the venue.
When I arrived, I set up my camera on a tripod and began filming the pre-ceremony preparations.
The Tripod’s sturdy construction made it easy to get the perfect shot, even in crowded and chaotic environments.
Its fluid head lets me pan and tilt smoothly, capturing every critical moment without jerky movements.
I could easily and precisely capture all the special moments of the wedding.
Features:
- Model: Manfrotto 502 Aluminum tripod
- Video Head: 502AH Pro with Flat Base
- Tripod type: MT055XPRO3 with Center Column
- Counterbalance: 22 lb Payload, 8.8 lb
- Height: 67″ Max with Column Raised
- Standard Max Height: 55″
- Materials: aluminum alloy
- Base mount: 3/8″-16 Female, Flat Base
- Counterbalance: Fixed (8.8 lb / 4 kg)
Mounting screw:
Its 3.8″-16 Male mount allowed me to easily adjust the angle and direction of my camera without moving the entire TripodTripod.
And I could attach a slider, jib, or other camera support system to the 3/8″-16 mount to achieve more complex shots.
Drag control:
This Tripod has pans and continuous drag controls, and pan control helped me smoothly rotate the head without introducing any jerky movements.
Continuous control allowed me to control the speed and smoothness of my camera movements and prevented sudden jerks or movements.
Panning range:
When I was shooting a sunset time-lapse video, its 360-degree panning range can allow me to capture the changing colors of the sky as the sun moved across the horizon.
Why is this tripod the best?
I find it is built to last with high-quality aluminum construction.
It can support up to 15.4 pounds, making it suitable for heavy-duty DSLR cameras and professional video equipment.
It features a quick-release system for easy and fast setup.
The leg locks are also easy to use, making it simple to adjust the height of the Tripod.
Conclusion:
Overall, this Aluminum Tripod is a solid choice for photographers and videographers who need a durable and reliable tripod that can handle heavy equipment and provide smooth camera movements.
Click here to buy!
Monopods:
Monopods are a popular accessory among photographers and videographers due to their portability, ease of use, and versatility.
They provide stable support for your camera or video equipment, allowing you to capture sharp and steady shots in various situations.
Whether you’re shooting sports events, wildlife, or landscapes, a monopod can be a valuable tool in your kit.
In this blog post, we’ll explore the benefits of monopods and discuss some key features to look for when choosing the right one for your needs.
Manfrotto XPro video monopod:

I went on a hiking trip to the countryside with my few friends and decided to make some stunning landscape videos for my youtube subscribers.
I want a monopod on my adventure due to its portability and ease of use.
So, I bought a Manfrotto XPro video monopod.
The first time I took it out to shoot some landscape videos, I was blown away by the difference it made.
The monopod provided stable support for my camera, allowing me to capture smooth and steady shots.
This monopod’s fluid Base made it easy to pan and tilt the camera, giving me the flexibility to capture the stunning vistas around me.
Features:
- Model: Manfrotto XPro video monopod
- Load Capacity: 17.6 lb/ 8kg
- Head type: Fluid
- Maximum Height: 79.9″
- Closed Length: 30.7″/78cm
- Leg Sections: 4
- Weight: 4.6 lb/2.1 kg
- Base: Fluid
- Locks: Quick Power Flip lock
- Tubes: D-Shaped Anti-Twist tubes
Video head:
With its 500-fluid video head, I could provide smooth and fluid movements in the video footage.
It helped me to dampen any jerky movements resulting in smooth and more controlled camera movements.
It also provided stable support for my camera, allowing me to take perfect shots without worrying about shaky footage.
Side locks:
Its side locks are safe and rapid, and they allowed me a safe and rapid way to set up and adjust my equipment.
It also allowed me to quickly lock and unlock the sections of the monopod, making it easy to adjust the height and length to my needs.
These side locks provide a reliable and safe way to keep my equipment stable and secure, giving me peace of mind when shooting.
Tubes:
D-Shaped Anti-Twist tubes are a feature in some monopods designed to prevent unwanted rotation or twisting of the monopod sections.
This is particularly useful when shooting with heavier equipment, as it supports a stable and secure camera or video equipment.
Why is this the best?
I was particularly impressed with the monopod’s lightweight and portable design. I could easily carry it on hikes and outdoor adventures without feeling weighed down. The adjustable leg sections also made it easy to customize the monopod height to my needs.
Conclusion:
Overall, using this monopod has transformed the quality of my landscape videos.
I can now capture stunning footage that I am proud to share with others.
If you want to take your videography to the next level, try the Manfrotto XPro video monopod.
Click here to buy!
Sliders and dollies:
Consider using sliders and dollies if you’re a filmmaker or photographer looking to add movement and visual interest to your shots.
Sliders and dollies are essential tools in a filmmaker’s toolkit, allowing for smooth camera movements that can add dynamic energy to your videos and photographs.
In this blog post, we’ll explore how sliders and dollies are helpful and the benefits they offer for capturing stunning, professional-looking footage.
Whether you’re a professional or just starting, discover the best sliders and dollies to take your work to the next level.
Viewer’s carbon fiber slider:

One day I decided to take videos of wildlife and headed on my journey to the nearest forest.
It was a crisp morning in the wilderness, and I was preparing to film some wildlife videos.
I always strive to capture the natural movements of the animals in their natural habitat, and I knew Neewer’s carbon fiber slider would be the perfect tool for the job.
I set up my camera and attached it to the slider, adjusting the tension to ensure smooth movements.
As I watched and waited, a herd of deer appeared in the distance.
I slowly moved the slider to capture their graceful strides and movements fluidly captured on camera.
Features:
- Model: neewer’s carbon fiber slider
- Compatibility: Compact Cameras and Camcorders
- Remote Control: Wireless
- Load Capacity: 11 lb
- Track Length: 39.4″
- Shooting effects: Time-Lapse, Panorama & Tracking
- Battery types: NP-F Battery
- Cable Set: Shutter Release
- Threads for Mounting: 1/4″-20 and 3/8″-16
- Construction: Carbon Fiber and Aluminum
Sliding system:
With its motorized slider system, I could create dynamic camera movements without physically moving the camera to myself.
It also abolishes the need for manual adjustments, which can result in jerky movements and shaky footage.
Pan and tilt range:
It features a 120-degree pan and tilt range, so I smoothly and precisely move my camera horizontally along the slider and capture a wide range of scenery in one shot.
Wireless connectivity:
This slider features a 2.4 GHz RF wireless connectivity, providing a reliable and convenient way to wirelessly control my camera’s movements.
It also added an extra layer of versatility and creativity potential to my camera setup, allowing me to manually capture shots that would be difficult or impossible to achieve.
Why is this the best?
I could capture stunning footage that captured the animals’ essence and natural movements.
Whether filming deer grazing in the morning light or playful otters frolicking in a stream, the slider allowed me to add an extra layer of artistry to my work.
And I knew that I had Neewer’s reliable and high-quality equipment to thank for it.
Conclusion:
This slider offers a high-quality, affordable solution for adding dynamic camera movements to your work.
Whether you’re shooting a time-lapse video, capturing panoramic shots, or want to add some creative flair to your footage, this slider is a great choice that won’t break the bank.
Click here to buy!
Stabilizers:
Stabilizers have become essential for photographers and filmmakers who want to capture smooth and stable footage.
Whether you’re shooting a wedding video, a documentary, or just trying to capture your child’s first steps, a stabilizer can help eliminate shaky footage and produce professional-grade results.
From handheld stabilizers to wearable rigs and motorized gimbals, there are various options to choose from that can cater to your specific needs.
In this blog post, we’ll explore the available stabilizers and their benefits, helping you find the right stabilizer for your camera setup.
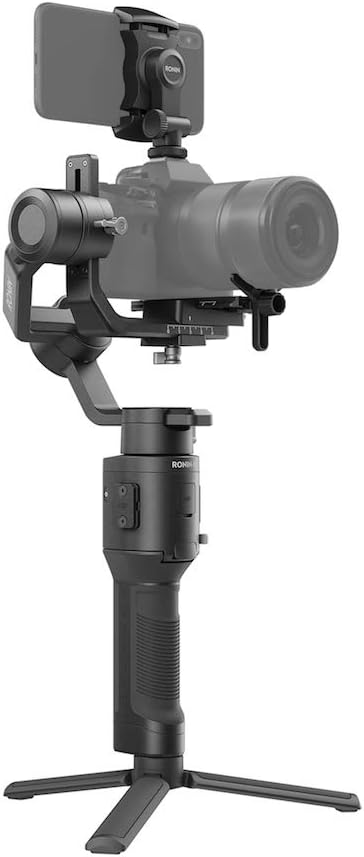
DJI Ronin SC:
It was a warm summer evening, and I was eagerly waiting to capture the mesmerizing dance performances at the annual dance t.v show.
As a videographer, my job was to capture the essence of the dance performances and create a compelling video that would take the audience on a journey.
However, I knew that filming a dance show was a challenging task.
There would be a lot of movement, and I had to ensure the camera remained stable to get the best shot.
That’s when I decided to use the DJI Ronin SC stabilizer.
I had heard about its capabilities and how it could make filming smooth and effortless.
I was delighted to try it out and see the results for myself.
As soon as I set up my camera on this stabilizer, I knew it was a game-changer.
Features:
- Model: DJI Rohin SC
- Stabilizer: Three-Axis Motorized Gimbal
- Supports: Mirrorless Cameras
- Operation: One-Handed
- Load: 4.4 lb
- Force Control: Mobile Smartphone
- Subject Tracking: ActiveTrack 3.0
- Control: 360° Panorama & Time-Lapse
- Battery timing: Grip Lasts up to 11 Hours
- Connectivity: USB Type-C & Bluetooth
- Motor Protection: yes
- Slider: Quick Release
- Control and Configure: via Android/iOS App
Wireless frequency:
The 5GHz wireless frequency range provides a high data transfer rate and is less prone to interference than lower frequency ranges.
This allows for stable and reliable wireless video transmission, ensuring I can capture high-quality footage without lag or delay.
Mobile app compatibility:
Using a mobile app compatible with the stabilizer, I could control various camera settings such as focus, exposure, ISO, and white balance and activate various features such as time-lapse, slow-motion, and face tracking.
Follow speed:
This stabilizer has a 180-degree follow speed that allowed me to capture the fast movements of the dancers and get a smooth, stable shot without the jerky movements.
Why is this the best?
By this, I was able to capture the essence of the dance show and create a stunning video that left a lasting impression on everyone who watched it.
It was an experience I would never forget, and I knew this stabilizer would be a permanent part of my filmmaking gear.
The smoothness and stability of the shots made the video captivating and engaging.
The audience was transported to the dance show, and they could experience the performances as they had never before.
Conclusion:
The battery life was impressive, and I didn’t have to fear running out of power during the show.
The lightweight design of the stabilizer made it easy for me to move around and capture different angles of the performances.
Its three-axis stabilization system made it possible to capture smooth and fluid movements.
I could pan, tilt, and roll the camera effortlessly and capture stunning shots.
Click here to buy!
DJI RS3:

A few days back, I attended a sports event in Morocco where I had to make videos and broadcast them for a sports channel.
I arrived there armed with my DJI RS3 stabilizer, ready to capture all the action on camera.
As I scanned the bustling crowd of athletes and spectators, I knew I was in for a challenge.
But with my trusty stabilizer, I felt confident and ready to tackle the task.
As I began filming, the stabilizer’s smooth and steady movements ensured that each shot was captured precisely and clearly.
With the help of the mobile app compatibility, I could remotely adjust the camera settings and monitor the footage in real-time, ensuring that each shot was perfectly framed and focused.
Features:
- Model: DJI RS3
- Design: Lightweight with 6.6 lb Payload
- Supports: Sony a7S III, Canon R5 Cameras
- Touchscreen: Advanced 1.8″ OLED
- Mode Switching: Instant
- Image Transmitter: Supports Wireless
- Motion Control: Via Smartphone
- Operation Time: 12-Hour
- Knob: Fine-Tuning on Tilt Axis
- Creative Functions: s Time Tunnel
Wireless frequency:
This gimbal stabilizer has wireless video transmission capabilities that allow me to view the footage in real time on a monitor or mobile device.
This is especially useful when I need to be physically separated from the camera, such as when filming in tight spaces or dangerous environments.
Mobile app compatibility:
Some mobile apps also monitor real-time footage, allowing users to view it on their mobile device and adjust the camera position accordingly.
This is especially useful when the camera is placed in a hard-to-reach location or filming from a distance.
Follow speed:
This stabilizer has the following speed of 360 degrees, allowing the camera to pan or rotate in a complete 360-degree circle at a certain speed.
It allows me to capture smooth and fluid shots of a subject moving in a circular motion, such as a dancer or an athlete performing a routine.
By following the subject with a smooth, continuous motion, the stabilizer creates a cinematic effect that enhances the overall quality of the footage.
Why is this the best?
Its intuitive touchscreen interface makes it easy for me to navigate and adjust settings on the fly.
It also offers a long battery life, with up to 12 hours of runtime, so I could shoot for extended periods without recharging.
Conclusion:
I was grateful for the stabilizer’s long battery life, which allowed me to keep filming without interruption.
Thanks to its advanced features and reliable performance, I successfully captured every thrilling moment of the sports event, creating a stunning video that would be cherished for years to come.
Click here to buy!
Jibs:
Jibs, also known as camera cranes, are essential for any filmmaker or videographer looking to add dynamic movement and perspective to their shots.
Whether you’re shooting a music video, commercial, or feature film, a jib can help you capture stunning footage from unique angles and heights.
Jibs can make your job easy, and you will get stunning shots by using them effectively.
In this blog post, we’ll explore the best Jibs and how they can be used to create captivating visuals.
ProAm Orion Jr DVC60:

I am currently working as a filmmaker with a big team, and we had to start work on our next project.
The film was about a girl who loves adventure and is stuck in a wild forest, so I had to be creative to show the fear and perks of the adventure.
I invested in a jib and bought a ProAm Orion Jr DVC60 jib.
I waited for this moment for weeks – the chance to use this powerful filmmaking tool to capture the perfect shot.
With the jib’s smooth movement and precise control, I knew I could create stunning visuals to take my film to the next level.
Features:
- Model: ProAm Orion Jr DVC60
- Load Capacity: 12 lB
- Reach from Fulcrum: 2 to 3′
- Design: Auto-Leveling
- Bars: Dual Counterweight
- Dumbbell Weights: Accepts Standard
- Setup: Tool-Less
- Construction: Powdered-Coated Aluminum
Load Capacity:
This jib has a load capacity of 12 lb, which is the maximum weight it supports without compromising its stability and performance.
It is essential to consider the load capacity of a jib when selecting one for your project, as a jib that can’t support the weight of your camera and accessories could result in shaky or unstable footage or even damage to the equipment.
Auto leveling:
It automatically adjusts the camera angle as the jib moves up or down.
This helps to keep the camera level and prevents it from tilting or rotating during the movement of the jib.
With this, I could focus on controlling the movement of the jib without having to adjust the camera angle constantly.
Setup:
Its toolless setup allowed me for quick and easy assembly and disassembly of the equipment without additional tools such as wrenches or screwdrivers.
By this, I saved time and effort during the setup and breakdown of the jib, which can be especially helpful when shooting on location or in a fast-paced environment.
Why is this the best?
By this jib, I could easily adjust the camera’s height and angle, allowing me to explore different perspectives and create dynamic shots that would draw in my audience.
Despite the jib’s powerful capabilities, it was surprisingly easy to use.
The lightweight design and intuitive controls let me focus on my creative vision rather than worrying about technical details.
Conclusion:
Ultimately, using this jib was a game-changer for my filmmaking process.
It gave me the tools and confidence to push my creative boundaries and create an outstanding film.
Click here to buy!
Audio recorders:
Audio recorders are essential for capturing high-quality sound in film or video production.
Whether you’re shooting a documentary, music video, or feature film, having a reliable audio recorder can make all the difference in the final recording.
Finding the best one for your needs can be challenging, with many options.
In this blog post, we’ll explore some of the best audio recorders on the market today, covering everything from their features and specifications to their overall value and performance.
By the end of this post, you’ll better understand what to look for in an audio recorder and which models are worth considering for your next production.
Zoom H1n:

Last year my friend asked me to join his team to record audio of a t.v show that would be broadcast later.
I accepted his offer and joined his team.
I felt excitement and anticipation as I stepped onto the television show set.
This was my first time working on a professional production, and I was eager to make a good impression.
As the cameras started rolling, I pulled out my Zoom H1n audio recorder and positioned it strategically to capture the perfect sound.
It was the perfect tool for the job – it’s compact size and intuitive controls made it easy to use, even in the hustle and bustle of a busy set.
I quickly captured crystal-clear audio of the actors’ lines, the sound effects, and the music cues.
Features:
- Model: Zoom H1N
- Recording: Speech, Sound Effects & Music
- Speaker: Onboard Stereo Mic, Built-In
- Input: 3.5mm Mic/Line with Plug-In Power
- Common Controls Layout: Simple
- Recording mode: WAV up to 96 kHz
- Headphone Output: 3.5mm Line
- Functions: Auto-Record & Pre-Record
- Battery Life:10 Hours
- Supports: microSDHC Cards up to 32GB
Sampling rate:
This audio recorder has a sample rate of 44.1 kHz, 48 kHz, or 96 kHz. A higher sample rate can result in higher audio quality and greater accuracy of the original sound.
A standard sample rate of 44.1 kHz for audio CDs is commonly used in digital audio.
48 kHz is commonly used in digital audio for video production and broadcasting.
96 kHz is a higher sample rate that can be used for professional audio recording, particularly in studios, where it can capture a broader range of frequencies and nuances.
File formats:
This recorder provides three file formats of recorder audio, including BWF, MP3, and WAV.
Through this, I could get various file formats according to my needs.
So for this particular scenario, I used the BWF format designed for professional audio applications.
Impedance:
Impedance refers to an electrical circuit’s resistance to alternating current (AC) flow.
In audio recording equipment, impedance can affect the quality of the audio signal and how it interacts with other audio equipment.
Why is this the best?
This audio recorder allowed me to capture audio that exceeded everyone’s expectations.
The director and producers were impressed with the final product, and I knew I had made a positive impression on my first day on the job.
With this recorder, the audio would have been smooth and precise, and the overall quality of the production would have been maintained.
Conclusion:
Ultimately, using this recorder was a game-changer for my audio recording process.
It gave me the confidence and tools I needed to capture high-quality sound on a professional production and opened the doors to many more exciting opportunities in the future.
Click here to buy!
TASCAM DR-60D MkII:

As the director of an independent film shooting in Cape Town, I knew capturing high-quality audio was just as important as stunning visuals.
So when selecting an audio recorder, I opted for the TASCAM DR-60D MkII, a versatile and reliable recorder that promised to deliver professional-grade sound.
As we embarked on our filming journey, I quickly realized that this mic was the perfect tool for the job.
Its dual XLR inputs allowed us to connect multiple microphones, including a shotgun mic and lavalier mics, ensuring we captured clear and distinct dialogue from all our actors.
Features:
- Model: TASCAM DR-60D MkII
- Purpose: Filmmaking, TV, Web Broadcast
- Optimized: DSLR Shooters
- Inputs: Dual XLR-1/4″ with Phantom Power
- Mic/Line Input: 3.5mm with Plug-In Power
- Recording mode: in WAV up to 96 kHz
- Outputs: 3.5mm Camera, Line & Headphone
- Power Supports: Battery, AC, or USB Powering
- Card Supports: SDHC Cards up to 32GB
- Keys: Silent Soft-Touch Rubber
- Auto Level, Limiter & Low-Cut Filter
Display:
In audio recorders, the monochromatic display typically refers to a simple, single-color screen that displays information about the recording status, such as the level of the audio signal being recorded, the time elapsed, and other relevant information.
Sampling rate:
Higher the sample rate higher the audio quality, as it captures more details in audio form.
A sample rate of 44.1 kHz means that 44,100 samples are taken per second, while a sample rate of 48 kHz means that 48,000 samples are taken per second.
This supports three audio forms of 44.1 KHZ, 48 KHZ, and 93 KHZ, allowing me to record high-quality audio files.
This range of gain adjustment is relatively broad and allows for much flexibility in adjusting the levels of different audio sources.
Trim range:
It supports the 11db to +b 64 db trim range, which means that the device or mixer can boost the gain of an audio signal by as much as 64 decibels (dB) or attenuate (reducing) the gain by up to 11 dB.
Why is this the best?
It proved an essential tool throughout the filming process, allowing us to capture every sound, from the softest whispers to the loudest explosions.
And as we wrapped up filming and prepared for the editing stage, I knew that it had played a vital role in bringing our story to life.
Conclusion:
It was more than just a piece of equipment.
It was a partner in our filmmaking journey, always reliable and ready to capture the perfect sound.
And as we prepared to share our film with the world, I knew we had this audio recorder to thank for helping us achieve our vision.
Click here to buy!
Headphones:
Headphones have become essential to our daily lives, whether commuting to work, working out, or enjoying our favorite tunes.
With available options, finding the best headphones for your needs can be daunting.
From noise-canceling models to wireless earbuds, there’s a dizzying array of features to consider.
We will explore a few of the best headphones available today, considering sound quality, comfort, and durability.
Whether you’re a music enthusiast, a frequent traveler, or just looking for a solid pair of headphones for everyday use, we’ve got you covered.
Audio Technica ATH-M30:

As a dedicated gamer and content creator, I constantly looked for ways to improve the quality of my videos.
So when a friend recommended the Audio Technica ATH-M30 headphones, I tried them.
The first thing I noticed was the incredible sound quality.
The headphones delivered a crisp, clear audio experience, allowing me to hear even the slightest details in the game’s sound effects and music.
This made a massive difference in my recordings, as I captured the full depth and richness of the game’s audio.
Features:
- Model: Audio Technica ATH-M30
- Type: Circum-aural, closed-back
- Frequency range: 20 HZ TO 20 KHZ
- Impedance: 60 OHM
- Max input power: 1600 mW
- Sensitivity: 100dB SPL/mW
Frequency range:
It has a frequency range of 20 HZ to 20 KHZ, which covers the full spectrum of audible sound, from the deep bass tones at the lower end to the high-pitched treble sounds at the upper end.
Impedance:
This headphone impedes 47 OHM, and it impacts the performance of the headphones in several ways.
I require less power to drive them, and it also supports Android and IO devices, giving me the freedom to use them on any portable device.
Sensitivity:
Sensitivity refers to how loud the headphones get with a given amount of input power.
In other words, if you feed 1 mW of power into headphones with a sensitivity rating of 100 dB, they will produce a sound pressure level of 100 dB.
This measures how efficiently the headphones convert electrical energy into sound energy.
Why is this the best?
This headphone is known for providing a balanced and accurate sound, with clear and detailed highs, mids, and lows.
This makes it a good choice for music production and listening to various music genres.
It is built with high-quality materials and construction, which makes it durable and long-lasting.
The headphones also come with a protective pouch for storage and transport.
Conclusion:
It is often considered a good value for its price point, as it provides high-quality sound and durability at a relatively affordable price.
It is built with high-quality materials and construction, which makes it durable and long-lasting.
The headphones also come with a protective pouch for storage and transport.
Click here to buy!
Sony MDR-7506:

I love listening to music but only experienced the true magic of my headphones the day I decided to take them on my journey.
I have always heard about the power of music to transport people to different places and create incredible experiences.
With my trusty Sony headphones in tow, I decided to put this theory to the test.
I packed a bag and went on a backpacking trip through the wilderness.
As I trekked through the mountains and forests, my Sony MDR-7506 headphones became my companion.
They helped him to tune out the sounds of the world around him and focus on the music he loved.
Features:
- Model: Sony MDR-7506
- Drivers: 40mm Neodymium
- Design: Closed
- SEarcups: swiveling
- Cable: Single-Sided, Coiled Cable
- Case: Soft
- Deliver type: dynamic
- Impedance: 63 OHM
- Active noise cancellation: NO
- Frequency: 10 HZ TO 20 KHZ
Frequency range:
The frequency range of 10 Hz to 20 kHz is typical for most headphones.
This range covers the full spectrum of human hearing, typically from 20 Hz to 20 kHz.
Impedance:
This headphone has an impedance of 63 OHMS, which is the measure of the headphone’s ability to convert electrical signals into sound.
Generally, headphones with higher impedance require more power to drive them and may need a headphone amplifier to achieve optimal performance.
Sensitivity:
In practical terms, a headphone with a higher sensitivity rating requires less power to produce the same volume level as a headphone with a lower sensitivity rating.
This means that a headphone with higher sensitivity can produce louder sound levels when used with the same audio source and at the same volume setting compared to a headphone with lower sensitivity.
Why is this the best?
As I listened, I also found that the headphones helped me to connect more deeply with nature.
I could hear the birds chirping in the trees and the rustle of leaves in the wind, still fully immersed in his music.
Conclusion:
This headphone was particularly good at bringing out the nuances in the music I loved.
I could hear each instrument’s crisp, clear notes and every subtle shift in tempo and tone.
It was as if I was hearing my favorite songs for the first time, with a new level of depth and emotion I had never experienced before.
Click here to buy!
Reflector/diffusers:
When it comes to photography, lighting is one of the most critical factors that can make or break the quality of the image.
Whether you’re shooting indoors or outdoors, artificial or natural light, reflectors, and diffusers can help you manipulate the light to create the desired effect.
Reflectors bounce the light back onto the subject, while diffusers scatter the light to create a softer, more even illumination.
In this blog post, we’ll explore the differences between reflectors and diffusers and the various types available in the market.
NEEWER 43 Inch/110 Centimeter Light Reflector Light:

I purchased the Neewer 43-inch/110-centimeter light reflector light and was excited to test it on my next photoshoot.
I want to see the difference it would make in my images.
On the due date, I arrived at the location and set up my equipment, including the reflector light, which I positioned just right to capture the perfect amount of light.
I was working with my model Serah who is always willing to do new things and strike a pose.
As I started taking the photos, I immediately noticed the difference.
The light reflector was bouncing light back to the model’s face filling in the shadows and giving her a gorgeous glowing complexion.
Features:
- Model: NEEWER 43 INCH/110 Centimeter Light Reflector Light
- Reflectors: Gold, Silver, White & Black
- Diffuser: Translucent
- Frame: Steel Spring, Foldable
- Carry Bag: Includes
- Shape: round
- Working size: 43 x 43”
Diffuser:
I used this diffuser to reduce the intensity of the light, scatter it, and create a more uniform illumination that does not produce harsh shadows or hot spots.
This makes it worthwhile when I need a softer, more flattering light, such as in portrait photography or video shooting.
Frame:
A steel spring and a foldable frame in this reflector refer to the specific design of the reflector’s frame, which incorporate a steel spring mechanism to provide flexibility and durability while being easily foldable for convenient storage and transport.
Working size:
Its 43″ x 43″ working size is also large enough to cover most subjects and to reflect light from multiple angles, providing greater control over the final lighting result.
Why is this the best?
It is made of high-quality materials designed to last, including a durable steel frame and high-quality reflective surfaces that are resistant to wear and tear.
It is large enough to provide ample coverage for reflecting light onto your subject, making it suitable for various photography and video applications.
Conclusion:
It is an excellent choice for one who is looking for a high-quality, versatile light reflector that is easy to use, portable, and affordable.
Its large size and multiple reflective surfaces make it suitable for various lighting setups, while its high-quality materials ensure that it will last for years.
Click here to buy!
LED panels:
When it comes to lighting for video and photography, LED panels have become increasingly popular due to their versatility and ease of use.
LED panels offer a range of color temperatures, brightness levels, and mounting options, making them a favorite among professionals and amateurs alike.
But with so many choices on the market, choosing the best LED panel for your needs can take time.
Today we will explore some of the best available LED panels, considering color accuracy, brightness, portability, and affordability.
Whether you’re a filmmaker, vlogger, or photographer, finding the right LED panel can make all the difference in the quality of your work.
Godox LED500 lights:

Last week, I had a video shoot scheduled with a local business owner who was launching a new product.
I packed my gear, including Godox LED500 lights, and headed to the location.
As I set up my equipment, I noticed how easy the lights were to assemble and position.
I can easily adjust the brightness and color temperature, making it simple to create the perfect lighting setup for the shoot.
As the video began, I was impressed with the difference these lights made.
The footage was brighter, more transparent, and more professional looking than ever before.
I experimented with various angles and lighting setups that captured the product from various perspectives.
Features:
- Model: Godox LED500 lights
- Color Temperature: 3300-5600K
- Dimming Range: 3400-5500K: 25-100%
- Control: Onboard with LCD Panel
- Maximum input Power: 32W
- Slot: Built-In Color Filter
- Knob: Yoke with Tightening
- AC Adapter for Wired Power
- Photo metrics: 3300k
- Batteries: 2 Optional L-Series
- Dimming: yes
Color temperature:
This light’s color temperature range allowed me to accurately capture the colors in my footage.
I adjusted it according to my needs to make the product prominent.
I love playing with various settings to get the desired color accuracy and take my shot to the next level.
Dimming range:
I also set the dimming range accordingly, keeping my color temperature in mind.
The videos must be sufficiently bright and light.
So the products appear stunning and help my client to grab sales.
Photo metrics:
I want a yellowish tint in a few footage, so its photometric range 3300k allowed me to gain this result.
I achieved a warm and comfortable ambiance as I desired.
In the final videos, the environment I got was cozy and inviting, making them appealing and desirable.
Why is this the best?
It is designed with a user-friendly interface that allows me to adjust the light’s settings quickly and easily.
The light also comes with a wireless remote control that allows me to adjust the settings from a distance.
Conclusion:
It has a high color rendering index (CRI) of 95 and a television lighting consistency index (TLCI) of 94, ensuring accurate color reproduction in photography and video applications.
It is compatible with various light modifiers, including softboxes, beauty dishes, and grids, making it a versatile option for various lighting setups.
Click here to buy!
COB (chip on board) lights:
Regarding lighting for photography and videography, COB (chip on board) lights have become increasingly popular due to their high output and compact design.
COB lights consist of multiple LED chips mounted directly onto a circuit board, resulting in a more efficient and powerful light source than traditional LED panels. , finding the COB light for your needs can take time.
I will share the best COB lights available, considering color accuracy, brightness, size, and affordability.
Finding the right COB light can take your work to the next level if you’re a professional filmmaker or hobbyist photographer.
Godox SL60:

I struggled to capture the perfect shot for the client’s portrait session.
The lighting needed to improve despite adjusting the camera settings and changing the location.
Then my helper advised me to use a Godox SL60 chip on board lights, and I admired his idea.
I quickly set up the powerful LED light and turned it on.
As I adjusted the intensity and temperature, the scene in front of me was transformed.
The soft, diffused light illuminated my client’s face and cast a warm glow that highlighted her best features.
I captured the most beautiful and captivating photos I had ever taken.
The client was satisfied with the results, and I found powerful equipment to transform my photography experience.
Features:
- Model: Godox SL60
- Purpose: Video Production and Vlogging
- Output: 4100 Lux at 3.3′ w/ Reflector
- CCT: 5600K
- Power: AC
- Control: Onboard & Wireless
- CRI: 95
- TLCI: 90
- Mount: Bowens S Accessory
- Display: LCD
- Cord: Includes Reflector & Power
Photometrics:
It has the photometric data of “381 fc / 4100 Lux at 3.3′ / 1 m,” which means that at a distance of 3.3 feet or 1 meter, the light output of the COB light is either 381 foot-candles or 4100 lux (which are roughly equivalent).
Color temperature:
To get warm tones on her face to enhance her features, I adjusted it at 3000k by creating a cozy, intimate atmosphere.
I navigated through settings to adjust these settings, and after that, I took shots of the enchanting model.
Dimming range:
I adjusted the dimming range to 50% for an optimal light output level.
By this, my photos were well-exposed and not overexposed.
It also helped me to enhance the model’s features which looked astonishing.
Why is this the best?
It is a powerful COB light that delivers up to 60 watts of power, providing a high brightness level suitable for photography and video applications.
It has a high color rendering index (CRI) of 95 and a television lighting consistency index (TLCI) of 94, ensuring accurate color reproduction in photography and video applications.
Conclusion:
It has various accessories, including a Bowens mount for attaching light modifiers, a remote control for adjusting the light’s settings from a distance, and a built-in cooling fan to prevent overheating during extended use.
Click here to buy!
Aputure LS300x:

When I was in New York for my free photography class, I met my fantastic client, who asked me to take a few photos of him with his family.
I was there with my equipment and Aputure LS300x LED lights.
I set them up to take a few stunning shots of the family to show the love, warmth, and bond they share.
I asked them to pose as they liked and adjusted fewer settings on my camera and lights to take a few high-grade photos to make them happy.
Using a top-notch camera and this light, I finally got stunning shots that will last for years.
Features:
- Model: Aputure LS300X
- Purpose: Film, Broadcast, and Video Production
- Output: 20,500 lux at 3.3′ w/ reflector
- CCT: 2700-6500K
- Power: AC/ Battery
- Control: Onboard, Wireless, DMX & App
- CRI: 96 | TLCI 96 | CQS 95 | SSI 85
- Cooling system: Active
- Mount: Bowens S Accessory
- Effects: 9 Preset Special
- Includes: Remote, Reflector, Clamp & Bag
Lumens:
This light has a lumens range of 56,00, and by using this, I got bright photos of the family.
It measures the total amount of visible light produced by a light source.
Color temperature:
This light has a color temperature range of 2700k to 6500k that I adjusted to get the perfect results in my shots.
It uses multiple LED chips packaged together closely on a circuit board to create a single, high-powered light source.
Dimming range:
This light can produce 0 to 100% brightness, adjusted at 65% for optimal brightness in the final photos.
By this, I got perfectly exposed photos that were bright and crisp clear.
Why is this the best?
It has a high color rendering index (CRI) of 95+ and a Television Lighting Consistency Index (TLCI) of 96+, which means the light produces accurate and consistent colors that look natural and true to life.
It comes with a wireless remote control and a built-in Sidus Link App that allows you to control the light remotely from your smartphone or tablet.
Conclusion:
It is considered one of the best LED lights on the market for its high light output, accurate color rendering, versatile control options, robust design, and multiple power options.
It is powerful equipment to help you achieve your creative vision in various shooting situations.
Click here to buy!
Lighting stands:
Lighting stands are essential when setting up a lighting rig for photography or videography.
A sturdy and reliable lighting stand keeps your lights in place and allows you to adjust their height and angle to achieve the desired effect.
With many available options, choosing the best lighting stand for your needs can take time.
Let’s explore a few of the best available lighting stands, considering load capacity, stability, adjustability, and portability.
Are you’re a professional filmmaker or a hobbyist, finding a suitable lighting stand can make a big difference in the quality of your work.
GODOX 260T Air-Cushioned Light Stand:

I was filming a commercial for a logical business, and I scouted the perfect location, set up my camera, and was ready to go when I realized I needed to remember the light stand.
Thanks to my GODOX 260T Air-cushioned light stand that I purchased a few days back, it was still in my car. I quickly retrieved it from my car and set it up in seconds.
It was air-cushioned, making it easy to adjust the height of the light without worrying about it suddenly dropping.
I started taking photos and fewer videos, resulting in out-of-class results.
I take photos from various angles to make the product prominent and appealing to everyone.
Features:
- Model: GODOX 260T Air-Cushioned Light Stand
- Load Capacity: 22 lb
- Height: 114 inches
- Height: 48 inches
- Folded Length: 42 inches
- Sections: 3
- Spigot Removable: ⅝ inches with Threaded Ends
Load capacity:
This stand can support 22 lb weight safely.
This weight includes the light fixture and any modifiers or other accessories attached to it, such as softboxes, reflectors, or diffusers.
Column top mount:
It can mount various accessories with its 5.8″ receiver.
So I could attach light fixtures or boom arms to the top of the mount. It is a heavy-duty lightweight stand designed to support heavy-duty equipment.
Adapter:
It has a 1 x 5/8″ Stud with Reversible 1/4″-20 & 3/8″-16 Male adapter.
This adapter allowed me to switch between the two thread sizes easily.
Why is this the best?
It has a maximum load capacity of 5.5 kg (12 lbs), making it ideal for use with heavy lighting equipment, such as large strobes or continuous lighting fixtures.
The air-cushioned feature of this light stand helps prevent any sudden drops or damage to my equipment when lowering the height of the stand.
Conclusion:
This light stand is constructed from high-quality aluminum alloy, which makes it lightweight and durable.
It’s easy to transport and set up, making it ideal for on-location shoots.
Click here to buy!
CONCLUSION:
All the cameras we will discuss in this article are all right, guys.
Do you guys have any experience with these cameras? What are your thoughts on them?
Which are your best cameras for budget filmmaking?
Is there a camera I didn’t mention in this article that you love using for filmmaking?
Would you please leave your thoughts and comments below?
Related post:

I am a Professional and Certified Digital Photographer born in the USA. I have been in this field of photography for 22 years, and in these years, I have used many photography lenses and Cameras, which I want to share here on this website about my experience. The idea for Bestoflens.com is to provide honest information about different Lenses and Camera products in the format of a “Best lenses for AYZ” list. I want this website to be the last destination for people to pick the best Cameras and lenses to fit their needs. You can find our unbiased reviews here on Bestoflens.