
Last Updated on December 5, 2023 by Sharon Advik
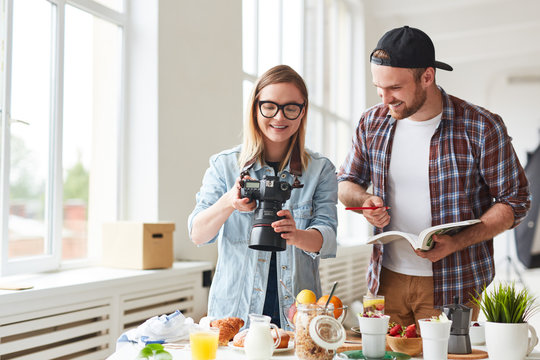
Food photography is a challenge for any photographer.
Regarding food, you must ensure that the lighting is perfect and the colors are vibrant enough but not too bright.
The best way to get good food photos is by using natural light.
If you’re shooting outside, ensure it’s not too sunny, or your photos will be washed out and too bright.
You can also use artificial light, but ensure it’s soft and not too harsh.
Try chopsticks instead if you have a fork or spoon in the photo!
It will help create a more abstract look and add more interest to your image than if just a fork or spoon were sitting there like an old relic from ancient times.
I have always loved to shoot food.
I thought it would be hard at first, but after a few tries, I got the hang of it, and now I love taking pictures of my meals!
I will never say I am a pro, but I don’t think anyone can be a pro in everything.
I have learned so much from shooting food, and I hope my story of using different cameras will inspire you too!
Which are the Best camera for food photography for beginners?
Here are my recommended top 7 Best camera for food photography for beginners:-
Sony A7iii: (Best camera for food photography for beginners)

I was up late, working on an article about food photography for a magazine I used to work with.
The report was due in eight hours, but I felt stuck and hungry.
So I opened my fridge and took out everything I could find: a fresh baguette, some olives, hummus, and other random snacks sitting there for months.
The photos came together slowly; they were grainy and blurry.
But when I switched to my Sony A7III camera and took another picture.
The light was perfect!
It made everything look so beautiful!
And it made the olives look like they were glowing from within!
The hummus looked like liquid gold!
Even the crust on my baguette had an almost-metallic shine to it!
I knew then and there that this was the camera for me, so I decided to use it.
Features:
- 24MP – Full frame BSI-CMOS Sensor
- ISO 100 – 51200( expands to 50 – 204800)
- 5-axis Sensor-shift Image Stabilization
- 3.00″ Tilting Screen
- 2360k Electronic dot viewfinder
- 10.0fps continuous shooting
- 4k at 30fps and FHD at 120fps Video Recording
- Built-in Wireless
- 650g. 127 x 96 x 74 mm
- Weather Sealed Body
ISO/Shutter Speed:
I knew my camera’s ISO and shutter speed were high.
I had researched the best way to shoot food photography, and the first thing that came up in my search was “use a high ISO and low shutter speed.”
So, I set my ISO to 100 and shutter speed to 1/125th of a second.
It is the optimal setting for shooting food because you want to capture as much detail in your image as possible while maintaining a high-quality image.
That is because you want to capture as much detail as possible when taking pictures of food.
The more light you have on your subject, the more facts will appear in your photographs.
Aperture/Field Of View:
It had an aperture/field of view of f/2.8-22 and a focal length range of 24-70mm.
When I started to focus on the food details, I noticed that those specs made a massive difference in my work.
The shot was blurry and not flavorful when I used my camera with a wide aperture.
When I used a narrow gap, the image looked like I took it with a microscope instead of through a lens.
The field of view also played an essential part in determining whether or not it would suit this kind of photography.
White Balance/ Frame Rate:
It allows me to take pictures with a white balance of “Auto” or “Incandescent” without adjusting anything.
I also like that it has a frame rate of 1000 fps, which means I can capture every minute detail of how something moves while shooting in slow motion.
This camera is great for food photography because it allows me to take pictures with a white balance of “Incandescent” or “Fluorescent,” which helps me eliminate any yellow tones in my photos.
The high frame rate lets me capture everything in one shot, so my viewers can see exactly how everything was cooked and prepared.
Why is this camera the best?
I understand photographing food is not easy, but with this camera, it has become much more manageable.
It’s easy to use and has many features that make my job easier.
The camera is also very lightweight and small, which helps me carry it around effortlessly when going on food shoots in different locations.
Conclusion:
It is the best camera for food photography for beginners because it has everything an amateur could use in the early days of their career.
I recommend it to anyone who wants to start a food blog or Instagram page but is still new and needs more money to spend on photography equipment.
So, buy it now!
Nikon D7500: (Best camera for food photography for beginners)

Since my last article on food photography, I have heard from many interested in learning more about the process.
I am so excited to share this information with you.
I have wanted to do food photography for a while and decided to plunge!
I have always been interested in cooking and baking, so it was a natural fit.
I am still new at this, but starting somewhere is essential.
Start small and keep working your way up to learn to do something well.
That’s what I did when I began photography – it didn’t matter if my photos were perfect; as long as they improved over time, we were moving in the right direction!
I wanted something new and exciting for my next article on food photography.
After much research online about different cameras and lenses available today, I decided on Nikon D7500 as my next choice because it had all the features I was looking for.
Features:
- 21MP – APS-C CMOS Sensor
- No Optical low-pass (anti-aliasing) filter
- ISO 100 – 51200( expands to 50 – 1640000)
- 3.20″ Tilting Screen
- Optical (pentaprism) viewfinder
- 8.0fps continuous shooting
- 4K at 30fps and FHD at 60fps Video Recording
- Built-in Wireless
- 720g. 136 x 104 x 73 mm
- Weather Sealed Body
ISO/Shutter Speed:
I remember when the office was jam-packed, and I could not find a place to click pictures, and I had to go outside to a restaurant kitchen to finish my task.
The ISO of this camera proved to be the best thing ever, as I was so worried about finishing things on time.
It had 100 – 51200 ISO, and I loved it.
The shutter speed was also good, but not as good as the ISO.
It could go up to 8fps continuous shooting, which was helpful when I had to click pictures.
Aperture/Field Of View:
I loved the Aperture of this camera.
It was f/2.8-f/5.6, which allowed me to click pictures in low light and also in bright sunlight.
The field of view was also good as it had a range of 0 – 20mm (35mm equivalent.).
However, the kitchen was not at all bright, but I still managed to click some good pictures.
This camera has a large sensor which helped me capture more light to take better pictures even in low light conditions.
White Balance/ Frame Rate:
The white balance was good as it had preset modes such as sunny, cloudy, and incandescent.
I could also manually set the white balance according to the surrounding light conditions.
The frame rate was reasonable but not great, as it could go up to 8fps continuous shooting.
However, this would depend on what you are shooting and how many different things around you need to capture at once.
Why is this camera the best?
I am lucky enough to have this camera, which I can use to capture all those moments I will remember forever.
It is the best because it has many features not available in other cameras and good build quality.
Conclusion:
It is the best camera for food photography for beginners because it has many features that are not available in many other cameras and good build quality.
It is the best camera for food photography for beginners because it has features only available in a few cameras and good build quality.
So, buy it now!
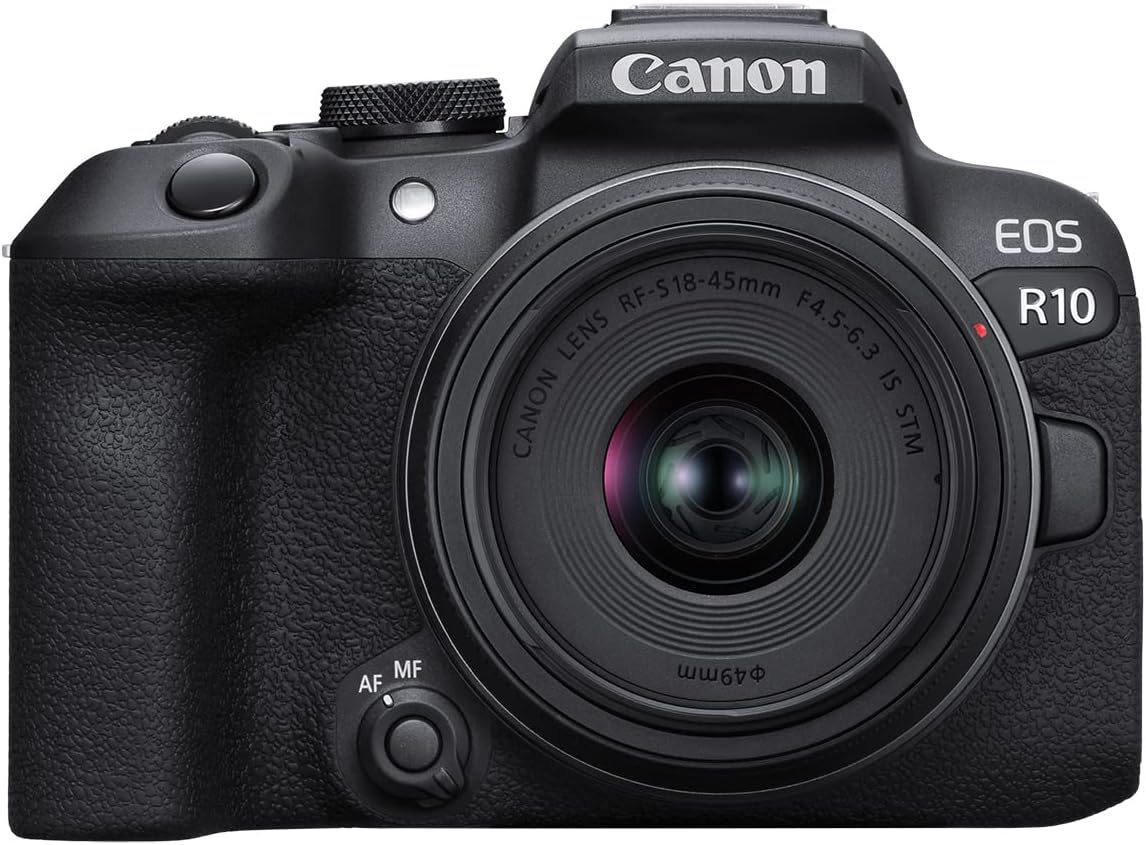
Canon R10: (Best camera for food photography for beginners)
I won’t lie.
I was nervous when I discovered I would be doing a food photography competition in Paris.
It’s one thing to post pictures of your dinner on Instagram, but it’s another thing entirely to create images that a panel of professional photographers will judge.
But then I remembered something: when working with food, you only need a camera and light.
And that’s what I did!
I got myself a Canon R10—a prosumer camera with manual controls that allow me to take pictures in almost any environment without worrying about lighting or focus.
And since it has manual controls, you don’t have to worry about fumbling around with settings while trying to get the shot done—you just set everything up once and then shoot away.
So now, whenever I’m looking for an easy way to take high-quality food photos, this is what I use!
Features:
- 24MP – APS-C CMOS Sensor
- ISO 100 – 32000( expands to 100-51200)
- 3.00″ Fully Articulated Screen
- 2360k Electronic dot viewfinder
- 15.0fps (23.0fps Electronic) continuous shooting
- 4K at 60fps and FHD at 120fps Video Recording
- Built-in Wireless
- 426g. 123 x 88 x 83 mm
ISO/Shutter Speed:
In between competitions, I had days when I could explore the city.
The people were friendly and warm, and the food was delicious.
The architecture was beautiful, the streets were clean and well-kept, and there were plenty of shops to explore.
But most importantly, this city has some of the best restaurants in the world!
I wasn’t sure if my camera could capture all of these details with its high ISO/shutter speed capabilities, but as soon as I started shooting photos around town, I realized that this camera had me covered!
Its ISO of 32000 max was enough to capture the details of a street sign at night, and its shutter speed of 1/100th of a second let me capture motion-blurred images while still getting some light in my pictures.
Aperture/Field Of View:
Its Aperture was also very commendable.
Its maximum Aperture of f2.8 was more than enough to let me capture the beautiful city lights at night, and its minimum Aperture of f22 allowed me to get a wide field of view while still getting some sunshine in my pictures.
White Balance/ Frame Rate:
I know that my camera has a white balance setting that is automatic, but I like to be able to set it manually to make sure that my photos are as true-to-life as possible.
It also has a frame rate of 30 fps (frames per second), meaning it can take 30 pictures per second when I click action shots or food photography, which proved very useful!
Why is this camera the best?
I love this camera because it’s so easy to use and has all of the features I need without any extra.
The ergonomic design fits comfortably in my hands, and its size makes it perfect for carrying around with me wherever I go!
Conclusion:
It is the best camera for food photography for beginners, as it has everything you need to start taking amazing photos.
It’s easy to use and has various features to help you get started on your journey into food photography.
I highly recommend this camera to anyone looking for a budget-friendly option that will allow them to take great photos!
So, buy it now!
Sony Alpha 6000: (Best camera for food photography for beginners)

I decided to continue my stay in Paris after winning the competition.
It would be good for me to do food photography by using Sony Alpha 6000 as my next choice when I was still in Paris.
I wanted to take pictures of the food because many different types are available in Paris, and I had a chance to try them all.
I took pictures of different kinds of French pastries, cheese, and other things I saw during my walks around the city center.
Many tourists visit this area of France, so many stores sell souvenirs such as t-shirts or other items related to France or French culture.
I also took pictures of the Eiffel Tower, one of Paris’s most famous landmarks.
I have seen it many times before, but I never thought taking pictures of this structure from a different angle would be possible.
Features:
- 24MP – APS-C CMOS Sensor
- ISO 100 – 25600( expands to 51200)
- 3.00″ Tilting Screen
- 1440k Electronic dot viewfinder
- 11.0fps continuous shooting
- Built-in Wireless
- 344g. 120 x 67 x 45 mm
ISO/Shutter Speed:
My camera clicked beautiful pictures during the day and even at night.
It was because of its 24-megapixel sensor and ISO range of 100-25600, which is expandable to 51200.
I was thrilled to see how well the images turned out!
The shutter speed ranged from 30 seconds to 1/2000, which is great for capturing any subject.
The camera also had built-in wireless, allowing me to transfer my pictures to my phone in just a few seconds.
Aperture/Field Of View:
The camera had an F1.8 aperture, which was great for capturing wide-angle shots.
The field of view ranged from 24mm-84mm, which allowed me to get a lot of detail in my pictures.
It also had an optical image stabilization feature that helped me take sharper and clearer shots even when I was moving around while taking them.
White Balance/ Frame Rate:
The camera had a white balance setting that allowed me to choose the right color for any shot, depending on the lighting conditions.
The frame rate was excellent since it ranged from 60fps-240fps.
All the pictures I clicked were in focus, and the colors were vibrant.
I could see single layers of puff pastry and the cream filling in my photographs, and I could also see the individual strands of spinach and ricotta cheese in a cannoli.
The camera has a built-in stabilization feature, allowing me to take clear shots even when moving around while taking them.
Why is this camera the best?
It gives you much control over the settings, making it easy to take professional-looking pictures.
It also has many features that make your life easier when taking photographs.
Conclusion:
It is the best camera for food photography for beginners because it can help any beginner take high-quality pictures and is easy to use.
It is an excellent camera for anyone who wants to start taking food photography but needs to know where to begin.
So, buy it now!
Fujifilm X100V: (Best camera for food photography for beginners)

Food is such a huge part of French culture, and it’s also something that everyone can relate to.
It’s easy for clients to see themselves in the images I create because they can connect to the food I photograph.
I realized it when I extended my stay in Paris and started photographing and learning more about the food culture there.
I love how French people take their time to enjoy meals and savor every bite they take.
They’re also very passionate about their food, whether it’s a classic dish or something new they’ve discovered at the latest trendy restaurant.
So, I got my hands on Fujifilm X100V and started photographing them.
It was a magical experience, and I fell in love with this camera and realized it was the perfect tool to capture my favorite travel moments.
Features:
- 26MP – APS-C BSI-CMOS Sensor
- No Optical low-pass (anti-aliasing) filter
- ISO 160 – 12800( expands to 80 – 51200)
- 35 mm f2.00 Prime Lens
- 3.00″ Tilting Screen
- 3690k dot Electronic and Optical (tunnel) viewfinder
- 11.0fps continuous shooting
- 4K at 30fps and FHD at 120fps Video Recording
- Built-in Wireless
- 478g. 128 x 75 x 53 mm
- Weather Sealed Body
ISO/Shutter Speed:
The ISO is the sensitivity of your camera to light.
The higher the ISO, the more sensitive it is to light; you get a brighter picture.
However, this comes at a cost – as you increase the ISO, your images will make more noise.
In low light situations where you need to raise your camera’s sensitivity, avoid using an ISO setting above 3200.
Aperture/Field Of View:
Changes in settings did not affect me because I got what I wanted!
If you want to achieve a shallow depth of field (where the background is out of focus), use an aperture between f/2.8 and f/5.6.
If you get everything in the direction, use an aperture setting between f/11 and f/16.
That was the best, and I still remember how beautiful my food pictures turned out!
White Balance/ Frame Rate:
The white balance should be set to Auto, and if you are shooting in manual, put it to Daylight or Cloudy.
The frame rate should be 24 fps if you want the video to look like a movie and 30 fps for web videos.
The ISO should be at most 200 because it will make your videos grainy and pixelated!
Why is this camera the best?
This camera is the best because it’s affordable, has excellent video quality, and lets you take amazing pictures.
It also has a large sensor that allows you to shoot in low-light settings without a flash.
You can use this camera for vlogging, photography, and even casual videos.
It’s easy to use and doesn’t have many complicated settings.
The only downside is that it doesn’t have a lens cap or case! Well, I can ignore that!
Conclusion:
It is the best camera for food photography for beginners because it’s easy to use and will help you create professional-looking photos.
It also works well for beginners because the large sensor allows you to shoot in low-light settings without a flash.
So, buy it now!
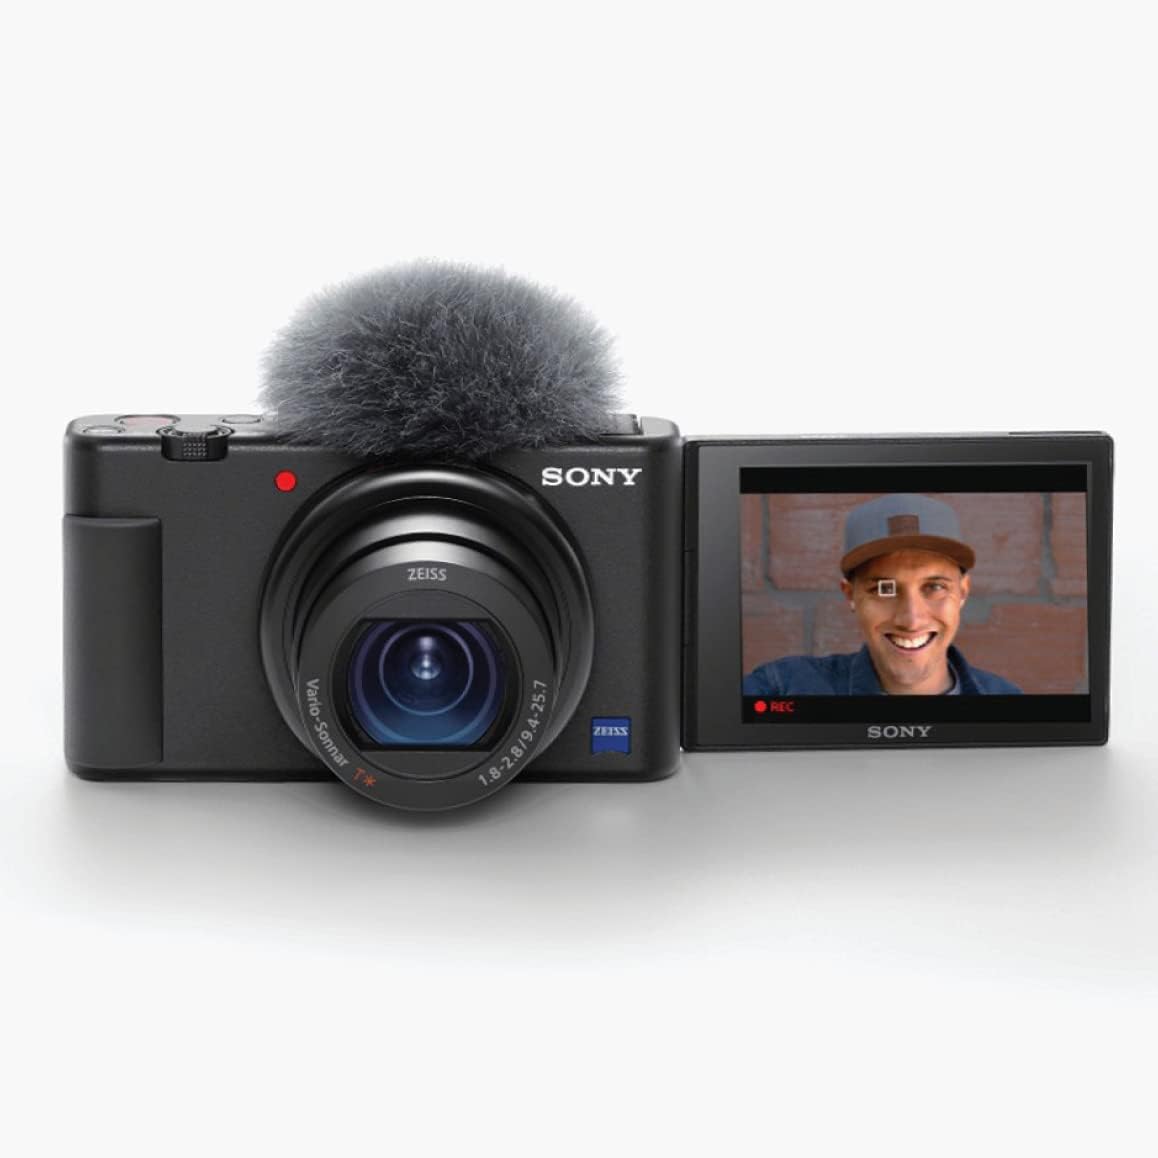
Sony ZV-1: (Best camera for food photography for beginners)
When I went to Russia, I was eager to try the local food and see what the locals were into.
I knew about many of them, like Borscht, but some were new.
I wanted to take pictures of all the delicious things I ate, and I had been curious about trying photography with my phone.
I experimented with my new Sony ZV-1 as a camera when I returned home.
The results were pretty good!
The camera is easy to use and has many features that make it easy to get great shots without carrying around heavy equipment or worrying about getting wet or dirty (essential when traveling).
The picture quality is also excellent—even though most of these photos weren’t perfect!
So if you’re looking for an affordable way to take photos on your next trip abroad or want an alternative way to capture everyday life at home, this might be what you’re looking for!
Features:
20MP – 1″ BSI-CMOS Sensor
ISO 125 – 12800( expands to 80 – 25600)
24-70 mm F1.8–2.8 Zoom Lens
Optical Image Stabilization
3.00″ Fully Articulated Screen
24.0fps continuous shooting
4K at 30fps and FHD at 120fps Video Recording
Built-in Wireless
294g. 105 x 60 x 44 mm
ISO/Shutter Speed:
I used the settings ISO of 800 and a shutter speed of 1/250th second.
It allowed me to capture the food being served in low light without using a flash and ruining the restaurant’s ambiance.
I also wanted to ensure that my photos were crisp enough so that people could see all the details on the plates but not too bright, so they looked overexposed when they were displayed online or printed out.
Aperture/Field Of View:
I set the Aperture to f/2.0, and the field of view was set to 180 degrees.
It allowed me to capture an image of all four diners with their faces showing clearly.
It also gave a nice background blur around them, which made them look more professional than if the image had been taken with a wide-angle lens.
White Balance/ Frame Rate:
I set my white balance to Auto so that the camera would adjust for any changes in lighting throughout the photo shoot.
I also set the frame rate to 30, allowing me to capture much detail in each shot without worrying about blurring from moving too fast or slow.
Why is this camera the best?
This camera is the best because it allows me to capture various images in one sitting without worrying about changing lenses or settings.
It also has a superb zoom range, allowing me to get close-up shots of the food but still have a comprehensive angle option if needed.
Conclusion:
It is the best camera for food photography for beginners because it’s easy to use and lets you capture beautiful photos without worrying about changing lenses or settings.
It’s also very affordable, making it an excellent option for anyone who wants to learn how to take better pictures of food.
So, buy it now!
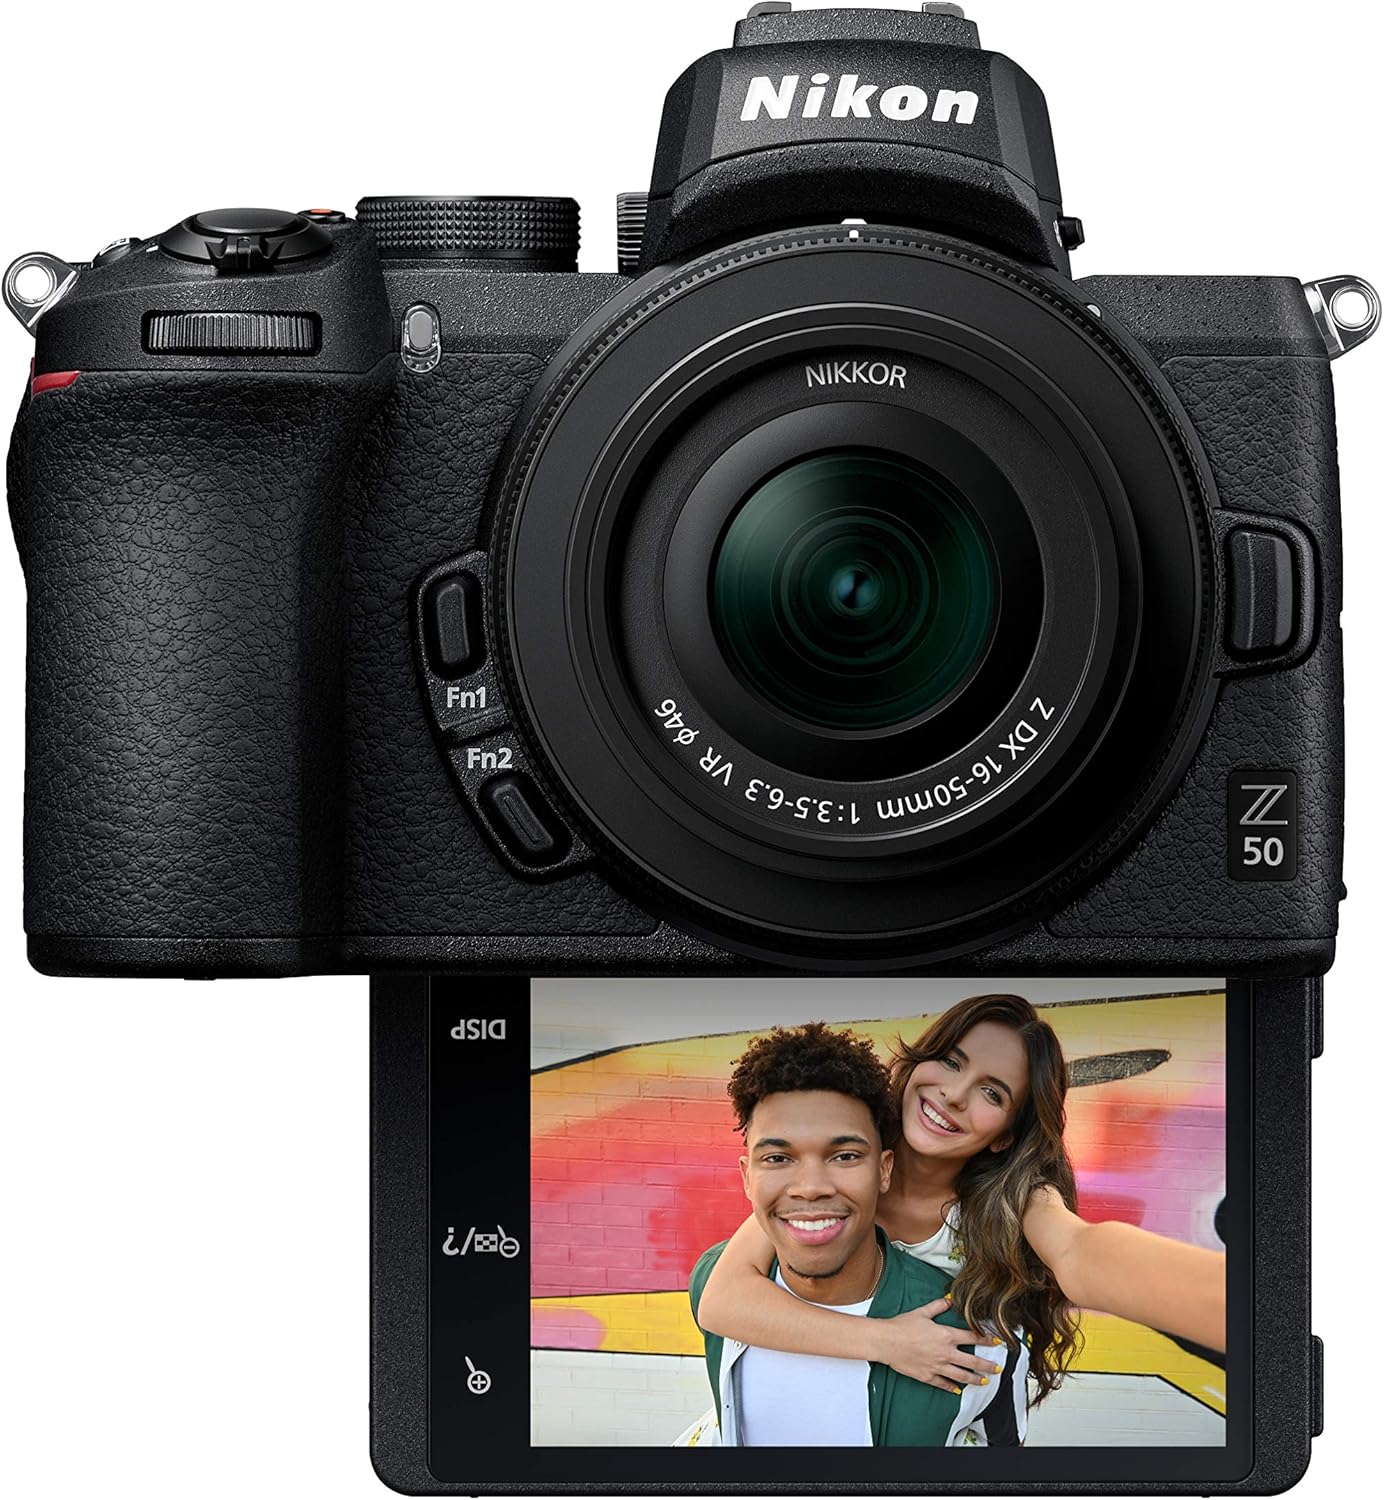
Nikon Z 50: (Best camera for food photography for beginners)
When my stay in Russia was prolonged, I decided to try food photography to make money.
I needed to figure out where to start, so I started researching how to get started with food photography.
I had an idea of what kind of camera I wanted, but it would be hard for me because of the cost of the camera itself.
Before shopping, I looked into other options besides buying one right away.
After researching, I learned about Nikon Z 50, an option for people who want a professional quality camera without spending too much money.
It’s not quite as expensive as other brands, but it still has all the features you’d expect from a high-end digital camera like this one.
I’ve been using this camera for years now and love how easy it is to use and how easy it is to manage all my photos with just one click!
Features:
- 21MP – APS-C BSI-CMOS Sensor
- No Optical low-pass (anti-aliasing) filter
- ISO 100 – 51200( expands to 204800)
- 3.20″ Tilting Screen
- 2360k Electronic dot viewfinder
- 11.0fps continuous shooting
- 4K at 30fps and FHD at 120fps Video Recording
- Built-in Wireless
- 397g. 127 x 94 x 60 mm
- Weather Sealed Body
ISO/Shutter Speed:
While traveling in Russia, I found myself at a café called Babushka (which means “grandmother” in Russian).
It was adorable—and it also had some fantastic food!
I wanted to capture the atmosphere of this place on camera, so I made sure to order some grilled cheese sandwiches and cappuccinos while there so I could show off my new camera’s capabilities.
I took some pretty incredible photos of my delicious meals at Babushka—and they’re still hanging up in my dining room today as a reminder of how much fun I had.
The ISO can be set anywhere from 100 to 51200, perfect for capturing high-quality images in low light.
I’ve used this camera to take photos of the stars above at night—stunning! It helped me a lot there!
Aperture/Field Of View:
The Aperture on this camera is another feature that I love!
It has an aperture of f/1.8, which means it’s good at letting light into the lens and making everything look as straightforward as possible.
The field of view on a DSLR camera is usually pretty narrow, but not with this one!
It has a wide-angle lens can capture more than just your average shot.
White Balance/ Frame Rate:
The white balance on this camera is another feature that I love!
It has a lot of different settings, including “cloudy,” “daylight,” and “shade.”
It helps me get the perfect shot every time.
The frame rate on this camera is also awe-inspiring!
It can capture up to 7 frames per second (7fps), so I can catch so many moments in one photo—and it doesn’t even look choppy.
Why is this camera the best?
It is the perfect camera for anyone who wants to take amazing photos.
It’s easy to use and has all the features you need in a DSLR camera.
I would recommend this one!
Conclusion:
It is the best camera for food photography for beginners because you can easily take professional-looking photos of your food.
This camera is also great for beginners because it’s so easy to use and has all the features you need in a DSLR.
So, buy it now!
CONCLUSION:
Alright, guys, that concludes all the cameras we will discuss today in this article.
Do you guys have any experience with these cameras? What are your thoughts on them?
Which is your Best camera for food photography for beginners?
Is there a camera that I didn’t mention in this article that you love to use?
Would you please leave your thoughts and comments below?
Related post:
Best Sony Camera for Food Photography:
Best cameras for macro photography:

I am a Professional and Certified Digital Photographer born in the USA. I have been in this field of photography for 22 years, and in these years, I have used many photography lenses and Cameras, which I want to share here on this website about my experience. The idea for Bestoflens.com is to provide honest information about different Lenses and Camera products in the format of a “Best lenses for AYZ” list. I want this website to be the last destination for people to pick the best Cameras and lenses to fit their needs. You can find our unbiased reviews here on Bestoflens.